Showing posts with label Cashmerette. Show all posts

Sunday, February 25, 2024

Just in time for warm weather - Cashmerette Stanton

The Sewjo has been Slowjo since my last post. And that means I probably won't have much chance to wear this before next winter, except for taking Cyrus out back in the mornings while it's still below 50F in the mornings. But, hey, at least it's finally done. And proof that I'm still sewing and updating the blog. 
This is a mash-up between the Cashmerette Stanton Hoodie and the expansion pack, which includes the collar and half-zip view. There is no specific view or instructions for the full-zip front with the collar, which is a shame IMO. Personally, I don't really like hoodies on me. They give me knots and static in my hair at the back of my head, and it's never cold enough here to really need a hood. 
 
So, I had to wing it to add the collar to the zip front and still include the zipper and collar facings. I'm rusty and I goofed, which I'll talk about below. But whatever. It's done. I like it. It fits great. And no one is really going to care about my goofs, including me. I did not goof on matching up seams, etc. and those are the parts that really show so I'm calling it a win.
I created a primitive color blocking guide (below) so I could keep track of what was what when I was cutting out the pattern pieces and took a pic of the computer screen so I'd have it on my phone and with me while cutting. 
 I ordered 2 zippers from Wawak. After I decided on the final color blocking, I went with the purple zip. The main fabrics are both French terry from L'Oiseau Fabrics in Canada, with a matching rib knit purchased at the same time for the wrist and hem bands. The navy French terry was re-purposed from my failed HP Beatnik
Here's where you can begin to see my goofs. I should not have serged the facing edge and, instead, turned it under and either handstitched (no way!) or stitched in the ditch. Or, even better, created a new facing piece that incorporated the collar. At the very least, I should not have used navy serger thread. I can live with it. It's a very casual jacket after all and there's no sewing police to give me a visible seam ticket.
Sigh.
What I can't figure out is why the zipper facings came up short. Below you can see the seam where I added length to the bottom of each facing. I laid my pattern piece over the fabric to confirm nothing had shrunk after fusing the interfacing on. I double-checked I cut the correct size. Swapping the hood for the collar shouldn't have mattered. I haven't seen this mentioned in any review I've seen so it's probably me. Life is full of mysteries. :-)  
Otherwise, everything fit together well and the size I chose was spot on. I started with an 18 E/F cup and graded outward at waist and hip. I believe 2-3 sizes, but I've put up my pattern pieces and I forgot to refresh my memory before I sat down at the computer. I also used the full bicep pattern piece. No other fitting adjustments were made or needed.
Here's a Sunday no make-up, dirty mirror selfie with a photo bomber.
And because that was so great, here's another with the proverbial hand-in-pocket shot. Speaking of the pockets, many have mentioned that these pockets are good for keeping hands warm but not so much for actually keeping things IN the pockets. I agree. A phone or dog treats will slide right out. Before I put away my purple thread, I will add an "X Box" (no, not THAT one, but a sewn square with an X inside) at the bottom of the pocket flap. Credit to Nina Niskanen for that idea.
My next project is going to be some old lady overnight underwear IYKWIM. Sigh. Getting old has some suckie parts.

Parting shot: Where Cyrus spends much of the day when I'm working from home, and where I'm sitting right now as I type this. This is technically my dining room, with the fold down leaves of my table folded down and the chairs stored in the garage. It's not pretty, but it's functional and the commute sure is nice. Who has dinner parties anymore?


Friday, December 1, 2023

Seamwork Meg Dress (and Beatnik wadder)

Yep, you read that correctly. Seamwork. 

I've been eying the Seamwork Meg dress for a while. There's just something about it that called to me. 

So I decided to test out a Seamwork membership because with a 15-day trial membership you get a free pattern download plus access to all the other membership stuff (message board, member projects, tips, project sheets, videos, etc.). If I decided to cancel, I'd still be able to keep the pattern at no charge and I wouldn't be charged for the membership — your credit card is not charged during the trial period. Good deal, right? 

So, I downloaded the pattern to have a look at the drafting, sizing, and instructions. I printed out everything and taped the pattern together. It all seemed in order. (I have some opinions — shocker! — about some of the instructions which I'll share later but overall, they're fine.) 

And here is my dress (still to be hemmed). And I love it!
My measurements put me in a size 20 bodice, but this pattern has a lot of ease and after reading through some of the Seamwork "Community" (message board) and seeing some YouTube videos on this and other Seamwork patterns, I think Seamwork patterns run large. I cut an 18 bodice and blended to a 22 at the waist/hip. My measurements would put me in a much larger hip size but there's plenty of design ease in this dress so I stayed at the 22. My sizing decisions worked fine. I also added length to the bodice. Instead of cutting the bottom edge at the 18 lines, I extended to the 22. Kind of a cheater FBA. Seamwork is supposed to draft for a DD in the larger size range, but, again, after my research, I thought I would need more bust length. I was right. The width is fine, but again, lots of design ease.

The fabric is rayon voile from Fabricmart. It was supposed to be challis, but it's not. I'm not lucking out with Fabricmart rayons lately. But I do love the actual print. Also, I see that I still need to more evenly distribute the elastic in the channels so the waist is looking a bit wonky. (If only I could distribute my own waist so quickly.)
The tie is organza ribbon from deep stash. I'm still "auditioning" it and I may end up making a tie from the leftover fabric, of which there is a lot. But I do like the bit of contrast so the ribbon may stay.
These are the "bonus" sleeves, which are "puffed" and have an elastic channel to create the gathered hem flounce. Members get "free" bonus views of patterns that you don't get if you just buy the pattern without a membership. I think that's how it works, anyway. The non-bonus sleeves are flutter style.
Line drawing of the bonus view.
Here's the dress in progress to show how low the neckline is before gathering shortens it. I also added about 6 inches to the skirt length, much of which is now taken up by the waist elastic. I haven't done a final hem yet, but I'm thinking I'll keep most of the extra length.
Side note:  Cyrus decided the pattern tasted good and I found this after walking into the sewing room one day. My fault for strewing pattern pieces all over the place. It taped together fine, but it turns out that the bonus view also comes with its own bodice pieces so I didn't need the chewed piece in the end.
Now on to my opinions about the instructions. Overall, they are fine and will get the job done, especially if you have some experience. But some of the methods are not necessarily "Best Practices." For example, almost everywhere, you are instructed to finish (zz or serge) seam allowances separately. Technically, that's fine. But it's not necessary to construct the pattern and on my lightweight fabric, serging one layer was horrible. I quickly ditched that after being sure no seams actually had to be flat. If there's no construction need for the seam to be flat/open, then I think the instructions should offer a choice. 

Ironically, there is no instruction to finish the seams of the CF bodice and facing, which means they end up raw edges which can be fiddly inside the neckline channel if your ribbon insertion doesn't go smoothly. The facing should be interfaced and it's not. This would eliminate one of those raw edges in addition to just giving the facing a bit more something-something IYKWIM. 

Another "bad practice" is you are instructed to sew the bodice sideseams before attaching the facing and doing the topstitching to it. Much, much easier to do all that in the flat and THEN sew the sideseams.

Lastly, the pattern uses 5/8" seam allowances everywhere. I know this is technically OK and standard for Big 4, but I personally hate a 5/8" seam allowance on a sleevecap. Since this one is gathered, it wasn't a big deal, but if it wasn't, I would have trimmed it down.

Out and out mistakes include some typos, a missing instruction to remove basting stitches from outside a seam allowance (the puffed sleevecap), and no instruction to understitch the facing join seam. These are things a sewist with experience would just do so they didn't slow me down, but a beginner would have no idea.

So, did I cancel my trial membership? Actually, I did not. I'm enjoying the behind the scenes features and other members and there are a number of other patterns I want to download/try, plus I might actually go through their Design Your Wardrobe class at my own pace since my closet needs a huge overall. I think I'm actually seeing marked improvement from Seamwork patterns and practices since their early days and I'm willing to give them another chance. We'll see how I feel next year at renewal time.

* * * * *

Now for The Wadder (HotPatterns Beatnik). Ugh. This fabric (French terry) is so nice that I hate to waste it so I'll probably just literally wad this up and put it in a pile for a while until I can repurpose it. But the actual garment is a Big No. It just looks horrible on me. It's just too much fabric in the wrong places and not enough where it's needed, and the neckline sits funny on me. I've wanted to try this pattern for a while and I'm glad I did finally get to it. It's now out of my system. I'll be trying a Cashmerette Stanton next, I think. 
The topstitching looks so wonky in these pics. That's about the only thing that actually turned out OK, but it doesn't look like it. Hah.
Parting Shot:  If you've made it this far, here's Alex prepping the bird for our Thanksgiving last week. He's an excellent Cook (haha, get it?). Seriously, though, he's done the turkey for a couple of years and it's always been SO GOOD. That's one of his 3 dogs, Oreo, standing behind him. Anytime anyone is in the kitchen, so is Oreo. It was a low-key but enjoyable day with my sons and all the dogs. I finished up the last of the leftovers last night. I'm ready for more turkey! 

Friday, August 9, 2019

Hidden Gem - Cashmerette Cedar Dolman Top

First things first. Yes, I have been absent from the blog for a freakin' long time. With that out of the way, soon I'll be buying myself a new home computer, so that should get me posting more often instead of waiting until I can "sneak" in a post from work (it's not really sneaking, but finding time because my work days are usually very busy). I've missed having a home desk.

Speaking of home … that's the biggest reason I've been MIA. I have moved yet again. (That's the new house from the listing photo below.) But this time (and hopefully the last for a LONG time), to a home I own. Relatively speaking because the mortgage company would probably have a bit of a say in actual percentage of ownership at this point. But it's good to be a homeowner again and in control of my living situation. I'm still in the City of Tampa; just a tiny bit further north. Instead of 7 minutes to work, it's now around 12 because of 2 additional traffic lights to get through. The new house is great. Lots more room all around. I won't have a dedicated sewing room (gasp!) but my bedroom is big enough to accommodate all of my regular bedroom furniture AND all of my machines and still feel roomy. It will work great for me … that is, as soon as I can finish unpacking and organizing.


This is the view from the LR into the dining area and kitchen, just after moving day. It looks a little better in here now, but not much. I want to hang shelves on the walls for books and a few deco items (very few since dusting is not my priority these days), but I haven't found the right shelves yet. I also need shelves in my bedroom so I can deal with my sewing stuff. I'm highly motivated to get on with those shelves, even if I have to settle for temporary versions, because not having them is holding up so much unpacking. And sewing.


So, on to the last sewing I did before I embarked on months of house hunting, packing, buying, and moving.

It's the Cedar Dolman Top by Cashmerette. And, for me, it's a hidden gem for two reasons: Letting it sit too long and not immediately looking past the envelope styling suggestions. Oh, and a third — nice fit! I'll have to double-check when I unpack this pattern again, but I believe I blended from size 16E/F at shoulder/bust to a 20 at hip. Whatever my blend was, it was straightforward going by my measurements to pick pattern sizing. I never have to adjust this mostly unfitted style during the day. It stays in place and doesn't slide forward or back as would a RTW loose-fit dolman that doesn't really fit, because my custom Cedar fits at both my shoulders and my hips instead of fitting one area and hoping for the best in the other.

I was given this pattern in PDF form by Cashmerette months and months ago, with no strings to test, review, photograph, or anything. And it sat in my download folder gathering digital dust. I finally opened the file, printed it, and brought it home. Where it sat collecting actual dust for a while longer. I'm not sure exactly what prompted me to at last have a go at it, but I did. I think I chose it because it looked fast and easy (spoiler alert: It is!) and because I was seeing lots of hem-tied tops out and about and I wanted in on that.


Looking past the pattern meant concentrating on the line drawings and not the athletic-wear styling and fabrication. I wanted a knit top I could wear to the office and out on the weekend. I'm so glad I finally cracked open the Cedar Dolman using some ITY dottie b/w knit because I have worn this top at least once a week since I finished it. I love it! It's comfortable. It's even trendy. And when I can finally get back to my machines, a second version is going to be the first thing I make.

The eagle-eyed among you may have noticed that I swapped out a "self-drafted" (using that term very loosely) vee neckline for the pattern's scoop neckline. I didn't find anything wrong with the pattern's scoop shape (
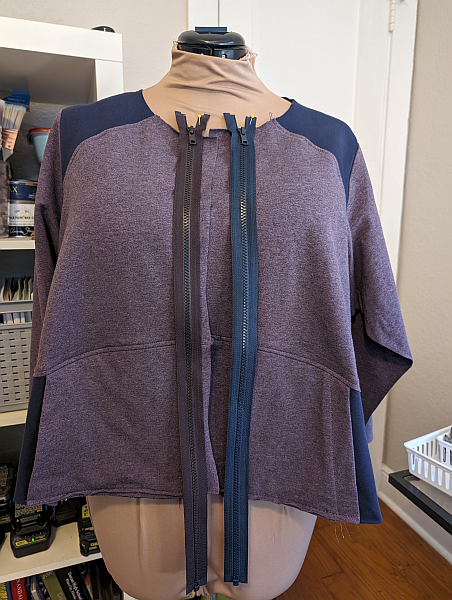
except for my dislike of neckline facings in knits); I just prefer vees. I would show you the pattern piece with my changes, but it's still in a moving box somewhere. Below you can see the top on Zilly posing in a corner of my new bedroom.


Below is the inside view. I changed the order of construction a little bit by (1) sewing fronts to backs along the shoulder and overlocking, (2) turning and coverstitching the neckline, and (3) sewing the CF seam and pressing the unfinished seam allowances open. I then picked up where the pattern instructs to attach the tie and hem facing, which is a very nice finish for the ties and gives extra oomph to the hem, and well-drafted so it all fits together perfectly.


Here I am in a mirror selfie in the former house. Photobomb by Chili. It was still pre-summer temps because I'm wearing pants. It's now near 90°F every day. And so, so steamy. Ahhh. Florida.


And here I am last week in work bathroom selfies with matching skirt. Because if you've been reading my blog for any amount of time, you know about me and my 2-piece "dresses." Plus, I needed to use up the extra fabric instead of packing it. The skirt is actually the very last thing I sewed before packing up all my sewing tools and supplies. It's McCall's 7386, version too-many-to-count.


And OMG that bathroom lighting does me no favors. I can't wait to get set up for pics in my new back yard. It's going to be great — brick pavers, natural light, tripod, privacy! (None of the stuff in the photos below is mine; these are more listing photos.) If only I could get Gillian to come down and take the photos! :-)


So that's what I've been up to. Plus work. You can also catch me on the Curvy Sewing Collective doing Pattern Roundups! See you soon!

Wednesday, February 6, 2019

In the Folds FREE Slouchy Cardi


What's better than a FREE, fast & easy sewing pattern? How about a FREE, fast & easy sewing pattern that will fit lots of bodies?


This is the Slouchy Cardi from In the Folds, offered for free download (FREE!) by Peppermint Magazine, here.

Click on the sizing chart below to enlarge it (or look at the sizing chart at the Peppermint Magazine site linked above). This pattern is drafted to be loose-fitting with a lot of ease, to give it that slouchy look. I'm not a huge fan of quite so much slouch so I picked my size by the finished measurements for Size F, which is still bigger than my actual measurements and gives me minimal ease, which is fine since the knit I used is plenty stretchy. (It's a Liverpool knit from Cali Fabrics, which is now sold out.) Because of the generous size range and sizING, this Slouchy Cardi will fit many shapes and sizes.


Here's the schematic for the pattern pieces. I wanted to point out the band piece and how long it is. (It's the sheets on the right starting at 35 and going straight down to 28.) Once you've got both band pieces sewn together and pressed, that's a LOT of curved band to wrestle with and attach evenly to the cardi body. Do not skimp on marking pattern notches (of which there are plenty, yay!) and do not skimp on pins. Do not do what I did and think you can just wing it, because you'll have to pin/re-pin about 378 times to get the band distributed evenly around the cardi body. Yeah. Not marking those notches was no shortcut.


And here's another of the fantastic work bathroom selfies. To make things even better, of course I used black fabric so you can't see any details.


In order to zoom in so you can see a few details, it meant including items that really showed the bathroom part of the "work bathroom selfie." It's hard to believe this scribble erasing is from a former graphic designer, but hey … I'm at work and this computer has no real photo-editing software so it was either this or a toilet and tampon dispenser. Hah. Anyway, the sleeves are finished with a wide cuff. This sleeve is not too long for me; I'm just holding the cuff in an attempt to show it better. I'm pretty certain that worked better in my mind. If you click the photo to enlarge it, you might also be able to slightly see the curved band around the cardi body. What you won't be able to see is the sideseam pockets, because I didn't add them. I was already below the pattern's stated fabric requirements and pockets just weren't going to fit.


Below you can see that this is actually a fairly long cardigan. I really love how easy but elegant the curved band is. With this cardi's slight cocoon shape, longer length, and dropped shoulders, I'm feeling 1980s goodness all over again. All I need is my shoulder pads and Aqua Net.


The last two pics are essentially the same. All I moved was my head, trying for that artful pose or something. Yeah, no.


And that's pretty much all I have to say about that (Forrest Gump). The dress I'm wearing is a Cashmerette Turner, made a couple of years ago, and still in rotation.

I know this essentially was a drive-by review, but that's just about how fast it is to cut and sew this Slouchy Cardi. Especially if you do 99% with your serger. I did use my sewing machine to edgestich around the entire band (but not the cuffs) and that's it.

* * * * *

On a different and more serious note, thank you for all of your kind words after my last post. The boys are doing OK. It was a shock, and still is, but we're moving on. All of the blended family came together in St. Augustine for a "Celebration of Life." It was everything it should've been and Mike would have loved it.


Saturday, February 3, 2018

Cashmerettte Rivermont Review

I know, it's crazy. Two blog posts from me within days ;-)

Here I am in my Cashmerette Rivermont dress. In the bathroom at work. So classy. My face says it all, no?


Obligatory pattern cover.


And line drawings.


And size chart.


Since I don't fit into any one size on the size chart, I do the morph-o-roo between a few sizes. Following the Cashmerette instructions to choose by my bust size doesn't work for me. I end up with a too-wide neckline and a bodice that falls off my shoulders. So, I pick for my bust size but ALSO for my upper chest/shoulder size by blending smaller for those areas. For Rivermont, that meant between 14-16 (C/D cup) at neck/upper chest and underarm, outward to the 20 at waist/hip. Kind of like my "cheater FBA" but in this instance it's my "cheater NSA" (narrow shoulder adjustment). (And OMG, now that I've typed NSA twice, should I be worried? Hah.) You can see what I did looking at the yellow highlighting below.


This gives me a pretty good fit throughout shoulders, underarm, and bust, no?


Overall, I like the pattern and think it's drafted well, and I do recommend it. But I do have a couple of mostly minor complaints. First up, is the pocket. While I love pockets, especially in my work clothes, the Rivermont pocket is HUGE. Immediately below looking at the pattern pieces, you may be able to get the general idea of how deep this pocket is. Look how close the bottom of the pocket is relative to the back vent.


Or, if that doesn't tell you the story, look at this photo, where, with my hand to the bottom of the pocket bag, half of my forearm is in the pocket too. That is a deep pocket! It's easily shortened for next time, though, so not a deal breaker by any means.


While I'm talking about the pockets, I'll point out that I used a black tech knit for the pocket facing. The main fabric is fairly lofty and textured and I thought a smoother fabric would be a better choice. It is. I really like how the pockets feel with my hands in them - the techno knit (same as I used for my black Hudson pants) is so nice. The main fabric is also awesome! I used exactly zero creative imagination for it, since it was part of a Rivermont kit offered by Cashmerette. I just fell in love with it when I saw it. It was a little pricier than I usually go for, but very worth it. It's definitely quality stuff.


The other nit I want to pick about the pattern is the neckline facings. If you've been reading my blog for any amount of time, you'll know my feelings on facings for knits. Hint: Not a favorite. At all. The front facing is kind of wimpy. It's nice that it's sewn into the shoulder and armhole seams, but that wasn't enough to tame it.


I understitched it. I pressed the heck out of it. Sat the clapper on it. And even left it pinned on Zillie for days. It wasn't enough.


So I brought out the big guns ... my elastic thread. Which I pulled through the channel created by the understitching, just enough to make it taut. Similar to my Gaping Neckline Fix, here.


And I added Steam-A-Seam under the facing edges to "glue" them down so they wouldn't move. The neckline now lays flat and the facing remains in place. I still hate facings though. (You can also clearly see how deep the pockets are.)


The back lays better, because it's a bit deeper and is going over a more convex curve of my upper back which holds it in place better than the more concave curve of a typical female upper chest. Also, pattern matching like a BOSS. Hehehe...


Here's my finished dress on Zillie (sans hem). Front neckline flat? Check. Not too wide? Check.


And another wonderful bathroom selfie. (I know I'm getting ancient, but that lighting really does me no favors. Ugh.) This will be a great multi-seasonal addition to my wardrobe. And so comfy too!


And during the colder months, I've got a matching unstructured jacket to wear over it. (Or, with jeans or the navy skirt that's in my sewing queue.)


I used Simplicity 1945, which I've made a few times before. I omitted the center back seam to avoid pattern matching and fabric waste.


Zillie models the ensemble, complete with serger thread tails before hemming:


Parting shot: This wonderful fabric is impossible to mark on the wrong side with my preferred washaway markers. I actually tailor-tacked for the first time ever. I felt so faaaannncy. :-)