Showing posts with label McCall. Show all posts

Monday, November 6, 2017

Alex, I'll Take Potpourri for $400

(Blogpost title referring to Jeopardy! and the mish-mash stream of consciousness that follows.)

It's been 3 months since my last confes.... kidding!... blogpost. Not as bad as last time when it was more like 6. I always want to blog but feel like I don't have enough thoughts to meaningfully fill up a post. Then a month goes by and I forget half of what I wanted to share to begin with or life just moves on, or both. So, here I am. Bear with me if things get ramble-y but I'm determined to get this done and posted.

The biggest news of the last few months is that (1) Tyler is out of the Marine Corps after 7+ years and (2) he got married. I'm not sure which he was happier about. KIDDING! He also just bought a house in St. Augustine and he and wife Angela moved in last week. He's now an actual Florida resident again and is less than 3 hours away. My (step)son Michael and his wife and son also live in St. Augustine so all of my boys are in the state and an easy drive.

The official wedding pics aren't available yet but I'll share the few I have. I didn't take many pics that day, knowing I'd be able to borrow from everyone else's cell. I just wanted to enjoy the day, not the phone.  


My boys, Left to Right: Michael, Alex, Tyler. The "baby," Alex (25), turned out the tallest. A fact he never forgets to mention. Tyler had as his groomsmen his brothers and two Marine buddies, one of whom was his best man. He's definitely made some lifetime USMC friends. Rah. Weird that he's now a former Marine.


Tyler and Angela in St. Peter's, an historic Catholic church in Beaufort, SC. They both looked beautiful. :-) Loved Angela's romantic and very tastefully feminine dress.


On the church steps.


Arriving in a 1957 Chevy to the reception, which was held at Traditions on Parris Island.


The Hollywood kiss!


After the reception at the "after party." Angela had changed into this dress. Tyler kept his tux on.


And, no. I didn't make my dress. I thought about it but my sewing time is so limited that I really didn't want to pressure myself. So I went shopping. Where I found even more pressure. Hah. I must have hit the stores in the drought of fancy dresses right after June brides and before the Holidays. There was almost nothing. But I did find the above dress at Dillard's and tried it on. I don't know that I would've tried it on had my choices not been so limited. It's basically a sheath and I don't usually go for those. But this was actually not bad, and ... on sale for $49. Seriously. I couldn't believe it was so inexpensive. So even though it was too big, by at least 2 sizes, I bought it because I knew I could do the alterations. (I wouldn't LIKE doing the alterations but I knew I could do them.)

I spent one entire weekend unpicking the CB seam in the dress and liningremoving the really long CB invisible zipper, taking in the dress at CB and sides, and re-hemming dress and lining for me and my sparkly shoes. I also added gathering to the shoulders of the cover-up so the armhole seam wouldn't be 3 inches down my arm. It worked in a pinch, looked pretty, and actually held up for the whole day/evening.

The funniest thing about this dress? It is pretty much the EXACT color of the bride's mother's dress. You would think we had planned it. And both of us matched the groomsmens' vests. Once we get the final formal photos, we're all just going to be so color coordinated! And puffy-eyed from bawling our eyes out. Her mom and I are criers. Even Tyler was teared up as Angela came down the aisle. Tissues for everyone! LOL

Moving on to sewing …

I started this McCall's 7381 well before the wedding. I thought I might wear it to the rehearsal dinner. Yeah, that didn't happen. Which is OK. It was actually on the cold side in SC that week so I would've frozen in this anyway. It was actually below 60 degrees F. Brrrrr.


I did finish it this past weekend and lucky you, you get more work bathroom photos. Dark, blurry, and so unflattering.

The dress is OK. I don't think it's super flattering on me but it's not the worst either. It is comfortable and it does fit. It's just got a bit too much waist floof to be my best silhouette (which you can see better on Zillie below). The dress may grow on me and I love this fabric, but even if it doesn't, I'm happy I made it. I liked the dress pattern when it first came out and I've wanted to try it. I'm not sure how I'll feel about ironing it when it comes out of the laundry. If nothing else, that may relegate it to occasional wear only. Not a big iron-er here anymore. Press-er when sewing, yes. Ironing, newp.

Pattern notes: I sewed it without too much pattern alteration. I did alter for my square shoulders since this is a woven (rayon challis from Fabricmart). I blended from 16-ish neck/chest to 20-22-ish at waist hips. I recall the pattern being lettered (S-M-L-etc) instead of numbered sizes, so blending was kind of an "by eye" thing. I also added about 6 inches to the above-knee view, since I wanted below-knee. I did not do an FBustA, but did a FBicepA (hah, so witty) of about 1 inch. The sleeves eased in very well, probably due to the give of the rayon. I haven't sewn a set-in sleeve in forEVER and I was not looking forward to fighting with excess ease. Luckily, I didn't have to. Dodged that bullet. All in all, it's a good pattern. I would recommend it.


It should be obvious in the pics above and below that I added pockets and have my hand jammed down in one. Pockets. Yay!


Here it is on Zillie. See the waist floof? It's kind of blouson-y, kind of not. I think it would be much better if my waist didn't have its own blousons.


Closer view of the bodice. I'm not sure if you can tell without me pointing it out, but I did sew down all the pleats (shoulders and waist, 12 total). I was not about to press pleats each time this comes out of the laundry, on top of regular dress ironing. No way.


Next up is the True Bias Hudson pant that's now a couple of years old. Nancy mentioned on Instagram that she converted one of her TNT woven pants patterns to a pattern for knits. I could do that, but I also like to just sew new-to-me patterns. Especially new-to-me *popular* patterns. I like to see for myself if the bandwagon is worth jumping on. I'm guessing I'm not alone. I'll keep you posted.


Signing off for now. I'll be back when I've got more wedding pics! I bet you can't wait. :-)

Thursday, July 6, 2017

Found!

I found both my sewjo and that big stack of missing patterns. Life is good.

Here's me today, back in the work bathroom for selfies, sporting the new 2-piece dress (aka skirt and top). And boy do I need a haircut!


But first, the missing patterns.


I have no explanation for not looking in this little chest/box which I walk past at least ten times a day, except that I must have just mentally ruled it out, thinking I already checked it. So glad I decided to double-check my assumption. It was like Christmas and my birthday all in one! And good to know that I haven't quite lost my mind. Yet.

Last post, I talked about mashing up my TNT Ottobre tee with the Love Notions Laundry Day Tee, the main reason being that I felt the overall upper bodice shape of the LDT was not the shape I knew I prefer for my tees. I did keep the LDT neckline and neckband piece, and swing shaping at the hemline, and I'm happy with those. The vee neckline shape is very nice and the band went on without a gape or pucker. I'll definitely use this neckline shape again. (Side note: Does anyone remember the Jalie 2005 tee and how that neckline stormed the online sewing world?)


I probably should've planned the seam on the band better relative to the print, but overall it's just not that noticeable from a regular distance, especially given the focus-pulling wild print. Or it's laziness. Or both. You be the judge.


Here's the top before any hems were sewn. Even after we all know the CF of the band isn't symmetrical, are you really noticing that? Yeah, I didn't think so. :-)


For the skirt, I used one of the long-lost-but-now-found patterns. I liked the flippy-ness/trumpet shape of all the lengths when I originally bought it, and still did once the pattern re-surfaced. The length I sewed is between Views D and E. I can see me using this pattern a LOT since it's only 2 pattern pieces and 3 seams and takes less than a yard of fabric for even my generous posterior.


So-so pattern matching at the sideseams. It's not an exact pattern to match so good enough is good enough, and about all that can be expected.


A quick hanger shot of the skirt. I decided to place the horizontal stripes section at the top of the skirt so they would be "hidden" under the top when worn. I thought it would be too much of a good thing to see one more row of those stripes. The eyes wouldn't know where to rest. I'm happy with that decision.


The whole outfit on Zillie.


I'll be back soon because I have another finished project to share, and I'm expecting a fun sewing blogger meet-up tomorrow. Stay tuned!


Tuesday, December 8, 2015

Enter Stage Right

Yep, I'm back. I didn't think I'd be neglecting my blog for so long but I'm finally sewing again and so I should be more regular here now. I feel like I have lots to catch you up on and I will over the next few posts or so. But for now, I'm just going to talk about the first finished sewing project to come off my machines in close to (if not over) a year. Although time has flown, I still can't believe it's been that long. And boy do I NEED clothes.

Here's McCall's 7254, one of the newer releases. Although I've been off-blog, I've still been buying patterns. :-) I cut out and started sewing it this past Saturday and finished on Sunday. It's a very quick sew and I can see adding at least one more to my wardrobe soon. I sewed a blend between the L and XL (the only two sizes in this envelope) and made no other alterations, and the only thing I'd change for a next time is to narrow the shoulders a bit. So nice to have a Win after such a long absence.


I sewed View C, which is the view on the left in the second row below. The instructions call for interfacing one layer of the all-in-one collar/front panel/peplum. I didn't for two reasons. First, LAZY. And second, it's a casual, unstructured knit jacket and I thought interfacing only one side of the panel would do weird things to the hand/drape of the knit. This was confirmed when I read some reviews, so I'm glad I left it off. My finished jacket hangs nicely and I'm not missing the interfacing at all.


Here's a shot of the inside. Seeing this, I'm thinking that with the right combo of two-sided fabrics, it could easily be reversible. My fabric came from Fabric Mart last year-ish and is not reversible. It's a textured knit which I think is part cotton, part synthetic. I had a near-disaster with the iron but luckily it was on the inside of the two-sided facing and doesn't show. Whew!


And the back.


I edgestitched the entire collar/facing/peplum piece and also the princess seams to hold the two-sided panel together better and to set off the seams (which shows more in real life than here in pics). The instructions don't mention either of these steps, but I would recommend at least edgestitching the collar/facing piece so it doesn't roll outward.


Here's a quick nighttime shot of where my machines are set up. Lots of windows in here but not enough room for a cutting table or fabric and pattern stash so I've had to spread out into other rooms and my pattern cabinet and most of my fabric currently live in the garage. It's still a work in progress but I'm slowly getting there. I'm hoping to get a good portion of my fabric into the house but I need to do some rearranging of armoires/shelving first.


Up next is the new Cashmerette Appleton dress. I was supposed to test this before its release but my lifestuff interfered. Jenny was very nice to send me a pattern (and fabric kit) anyway. I finished cutting it out tonight and hope to start sewing it tomorrow night. Stay tuned for a review on it soon.


After the dress, I'm wanting to make a long-ish black skirt. Once that's done, I'll pair it with the jacket and take some photos of me in everything.

Thanks to those who sent notes of concern and search parties. I'm doing great and happy to know you're still out there. I'll see you again here very soon!


Monday, August 18, 2014

McCall's 6752 In Progress

I did turn on the lights and machines in the sewing room yesterday, and got to work on McCall's 6752. I cut out the pattern and fabric and sewed the bodice. And that's where I ended since Alex and I took the dogs to the beach. We both really enjoy taking them there. It's close and free, and the dogs love it. Chili now knows where we're heading as soon as he sees the towels come out. He's so darn smart, that dog.


Tonight after dinner, I had some reserve energy (how did THAT happen?) and got back to the dress. Now all that's left are the hems.

I made View B, the one shown in the red print on the envelope. Lots of sewers in blogland have also made this view and I've liked them all, so it was time to be a sheep. :-) 


The only real alteration I made was to add 4 inches to the bottom of the skirt. All reviews (and my own eyes) said the skirt was SHORT. I cut the size 16 for the neck/shoulders and morphed to the 22 by the waist/hips, since laying my TNT Magic Pencil over the skirt told me that was the best size to use. I also added additional length to the cowl facing to help prevent inside-out-ness, especially since this ITY knit slips and curls almost on its own. I may yet still add a little weight to the facing to keep it in place.


I haven't tried it on yet, and I'm a little worried that it may be more revealing than I'm comfortable with. If so, I'll have to don a cami for an underlayer.

Does anyone else do this .... get the whole thing nearly finished and then don't try it on? I'm telling myself it's because I'm choosing to end the day's sewing session on a good note. In reality, it's because I don't want to possibly ruin my night by finding out it doesn't fit. Yep, I'm a chicken.

Sunday, January 20, 2013

McCall's 6397 #2 Finished and Stash Crash

After spending all day yesterday doing absolutely NOTHING more than 10 feet from my bed (reading, napping, catching up on the DVR), I was wide awake at 6 am this morning. After last week, I needed to recharge the batteries. Thankfully, I still have 2 days of weekend left (and a nice paycheck coming soon). Although most of the rest of today will be spent watching football,  I do plan to get into the sewing room in spurts to cut out the next pattern. More on that later.

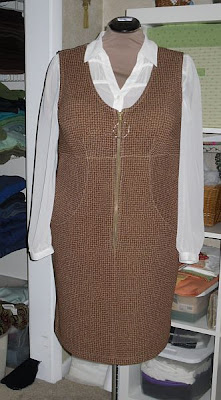
Meanwhile, I did finally finish the dress. It had been collecting dust on Zillie for two weeks waiting for the sleeve bindings and hem, but it's now done. I will probably wear it as styled below, with this RTW blouse.When I do, I'll snap a pic of me in it.


The zipper everyone commented on is just a basic brass zipper with a "leftover" earring put through the pull. Without a jewelry ring to hold it place, it doesn't really work to actually pull the zipper without opening and coming out of the pull but it does stay in place and hang straight if it's not pulling the zipper. These used to be some of my favorite earrings until I lost one so I'm happy to be able to use the straggler for something more than making me growl when I see it in my jewelry dish.


Last post I was flip-flopping about a Style Arc pattern order when I didn't like the freebie o'the month. Well, the $34 shipping charge made me close the shopping cart immediately. Sorry Style Arc. I'm just not ready to plop down nearly $100 for 4 patterns. I know others love them but only a few of the styles interest me and even then, they are just not all that and a $34 shipping charge so I will continue to watch from the sidelines.

I noticed Vogue was on sale at the BMV website and I quenched my pattern lust with these. I ordered them Wednesday and they were here yesterday. Unbelievable speedy! If I had made it out to the mailbox before the day was nearly over, I might have even sewed yesterday but who wudda thunk they'd be here already?


Up next is the dress version of 8825 (lower left). After that, 8805 (bottom middle), with the fabrics below which will be arriving soon. I turned the screenshot upside down since this is how I plan to use them in the colorblocking.


Hopefully I'll be back before the work week starts again, and with something to show (and wear).

Sunday, January 6, 2013

Rolling Along

Is this a lovely sight ... seams all lined up as they should be.


I made a lot of progress on the dress today. None on the Christmas decorations though. You all are a BAD influence. ;-) All that's left is binding the armholes and the hem. I did try it on and I'm happy to report that it fits like it was made for me. 

While working on the dress I was reminded again of something I keep meaning to talk about since it's a topic I don't see mentioned a whole lot on sewing blogs. Glass head pins. One of my favorite notions. A little expensive for pins but worth their price. I also have regular sewing pins (quilting pins, actually, because I like the extra long length) that I use when actually sewing but when I'm near the iron and have a need to keep something in place without burning my fingertips, I reach for these special pins I keep within reach of the iron.

In case you don't know why they're so great at the ironing board, it's because you can iron right over them. The glass heads resist the heat, unlike plastic-headed pins. Which means I can fold up a hem, stab pins into the board, and then press. On extra-fiddley fabric or curves or wiggly bits, I might pin proper so I can carry the fabric to the machine with the pins in place, but either way, it's great to let the pins do the holding while I press and literally save my skin.

Now it's time for season 3 of Downton Abbey. Is anyone else as happy as me that it's FINALLY back on?


Saturday, January 5, 2013

Sewing Won

But I'm betting you knew it would. ;-)

The invisible (magenta!) zip is in, the hem is complete, and the skirt is finished. I cut out a black lining and then decided not to use it. First, I wanted this done already so impatience won out, and second, I was thinking with the poly, it was just gonna be hot and static-y and my impatience didn't want to find out if that would be true. Since the lining is pretty much ready to go, I can always go back and add it if I change my mind. Or, I have a lining waiting for another skirt. The scrap around Zillie's neck is all that my friends Polly and Esther left me (BTW, P&E is not original, I think I stole that from Rachelle). I think I might serge a rolled edge and have a cowl/scarf, which I probably *won't* wear with the skirt.


Next up is another make of McCall's 6397.


I wore the first make all summer but it's definitely a summer dress and I've been missing it now that "winter" is here. If you were following along back then, you probably remember my disappointment at finding out too late that there's a drafting error in the pattern so that the pocket seam/waist dart on the skirt doesn't match up with the bust dart on the bodice in real life like shown on the envelope drawings. (I also notice that the human version on the envelope is the other view, the one without that seam. Hmm.) Other than that, I really liked this pattern and knew I'd make it again, after fixing that error.

It was actually a pretty quick fix. (So why, McCall's, didn't YOU do it?) I lined up the bust dart with the pocket seam and saw that all I had to do was re-cut it on the size 14 line. That's step 1.


Step 2 was to add onto the side piece (10) what was removed by recutting the seam above. Step 3, the last step, was to add onto the pocket bag (9) so it matched piece 10.


I knew I wanted to make this in a double-knit. The first make is a stretch woven and since it has about the same amount of stretch as a firm double-knit, I was fairly confident the fit would be similar. (Hope that confidence doesn't come back to bite me in the butt.)

I'm using this printed double-knit recently acquired from Fabric.com. I had ordered two colorways but only received this one because the other had sold out, darn it.


I auditioned some different thread colors for the topstitching and settled on the one at the bottom of this pic. It actually matches the light color in the fabric, but the lighting played tricks with the camera.

Here's where I am as of now. I'll get back into the sewing room tomorrow, but I also do want to tackle the Christmas crap ... er ... decorations ... too, so I'm not counting on a finished dress at the end of the day.


If this one works out like I think it will, I'm going to make another double-knit dress from McCall's 6394, probably similar to the bottom left view. You know I'll be checking those seams before I cut good fabric.


Now it's time for a chocolate martini ... which is chocolate-flavored vodka + creme de cacao + Godiva liquor, chilled in a shaker with ice and then drained. Yum! They were passing these out (in cute little martini shooter glasses) at my cousin's wedding last April and I've been hooked ever since. It took me a few experiments to come up with a mix that tasted like those, but even the trials tasted pretty darn good. Hic!

Sunday, October 21, 2012

Repurposed

I now have a new top to wear with my new skirt. Yay me. ;-)


This morning, the "fabric" looked like this, a too-big dress that I didn't think would be flattering anymore even if I took it in. The problem was, I couldn't just toss it either because I really like the fabric. It's just one of those perfect knits — it feels good, drapes wonderfully, and the print works well with my wardrobe.


So after I altered my pattern pieces for skirt #2 — and then chased down Dani who I thought had escaped the yard but apparently had turned invisible instead and was in the way back behind big full plant-y things stalking something in a hole for over an hour (was I ever mad and happy) — I put the skirt aside in favor of a no-brainer palate cleanser, which was repurposing the dress into a top. Enter McCall's 6078, which I have made before, although my pattern is now a morph between the original McCall's (front) and my ever trusty TNT Ottobre tee (back, armholes, and sleeves).


Many knit tops use a narrow self-fabric facing strip to finish the back neckline, which is usually a royal PITA to sew nicely with an ornery, slippery knit. Instead of fighting and swearing, I'll opt to bind with my coverstitch machine and or use clear elastic as the "facing." I couldn't bind today even if I wanted to because I didn't have any fabric to cut for a continuous binding strip. So it was the clear elastic method. I took a couple of pics so you could follow along. :-)

First, if the neckline has 5/8" seam allowances, you need to trim it back to a 3/8" seam allowance (to match the width of the elastic). Then, using a Teflon foot so it glides over the clear elastic, align one edge of the elastic to the cut edge of the neckline and attach to the wrong side with a small ZZ stitch. (f you don't have a Teflon foot, GET ONE. It's great for sewing those ornery knits and lots of other things too.) Leave elastic "tails" at the start and finish so you have something to grab onto when starting and finishing. Trust me, don't skip the tails or there will be swearing involved after all. Also, don't stretch the elastic (but pre-stretch it before you attach it). Just keep it taut against the fabric.


Next, turn the elastic to the inside of the neckline just the width of the elastic and use your coverstitcher to topstitch. If you don't have a coverstitcher, you can use a twin needle or a ZZ stitch. And that's it. See how nice and flat? No ripples, no stretching out. No swearing.


This (below) is what happens when you decide on a pattern and cut out the back piece before determining if you actually have enough length in the rest of the original dress for the cowl front piece. Uh, yes, I did and then I didn't. I ended up piecing the rest of the cowl onto the top edge. In this print and with the drape, it doesn't show at all. But since the shoulders have stitched pleats, close up the piecing seam looks like another stitched pleat anyway. It all worked out in the end. Whew!


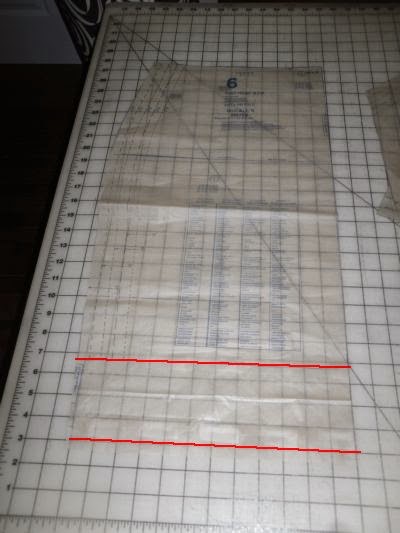
Here's skirt #2 altered and laid out to cut. The alterations were minimal but since I do not have a flat tummy, I needed more room for it. I added 1/4" to the sideseams and front princess seams at tummy level, which you can below. Because the waistband fit in the muslin, I had to taper back IN to the waist after adding for tummy, which makes for a weird pattern piece, but hey … if it works …


I may cut tonight or I may just veg in front of the TV. Anyone want to place a bet? ;-)