Monday, December 30, 2013

Modeled Mimosa

After 5 days off, I sure didn't want to get up when the alarm went off this morning but it was a little bit easier throwing off the covers knowing I had a new outfit to wear. Plus, I had to pee. TMI? Hahahaha ... sorry in advance for any young women reading, but the truth is once you're past a certain age, your bladder just doesn't let you sleep in. Isn't getting older grand?

OK, not exactly how I planned to start this post, but once the thought came, it just wouldn't go away.

So here's the OOTD. I really (as in REALLY!) like this top. So much so that I just might be popping out another one come Wednesday. The fit is perfect, with minimal alteration. The neckline is just right, both in shape and depth. The ties are adorable yet not too cutesy for a woman of my age (cough:29:cough). It's an easy sew. And the instant gratification PDF is very reasonably priced at $10.


Here's the lowdown on the minimal alterations, besides the 1-1/2" I added at the hem while cutting. Love that little arm thingie that slides onto my rotary cutter.

1. Moved the bust dart downward. See age comments above. Nothing complicated here. I just drew a box around the dart, cut it out, slid it straight down, and filled in the empty space with tissue.


2. Added 3/8" at the shoulder-neckline point of the raglan sleeve. My bra straps were covered in the muslin, but I just felt I wanted a smidge more. The smidge added was the perfect amount.


3. Fiddled with the raglan dart in the fabric, until I ended up with this new seamline you see in red below. I've had the poof problem with darted raglans before, so I'm definitely chalking this one up to my particular shoulders and not the pattern.


For next time, the poof has been trimmed from the pattern so I should be able to just sew and go.


Parting shot: This pic is for Barbara. A quick blurry and crooked mirror selfie in the messy sewing room after throwing on my black knit dog-walking pants. IOW, the real me. And yes, I love this top so much I left it on to walk the dogs. They were impressed.

SBCC Mimosa


I sewed 4 items during my mini sewcation ... a SBCC Tonic tee, a pretty well sewn (vs. down and dirty since I was also testing construction) muslin for the SBCC Mimosa top, the final Mimosa, and a slightly modified Magic Pencil to wear with the Mimosa. My sewing plans are always grander than reality, but I'm good with 4 items over 5 days, especially considering I didn't spend every waking hour in the sewing room. The mojo is still whispering to me, so maybe I can pick back up mid-week when I'm off from work again for New Year's Day.

Here's the final Mimosa with the Magic Pencil. The Mimosa is from a black/taupe crepe print from deep in the stash, which I thought was synthetic but after pressing the heck out of it without any heat damage, I'm reconsidering and may do a burn test on scraps just to quiet my curiosity. The Magic Pencil is from a putty colored doubleknit purchased from Lucy's Fabrics years ago. I miss that shop. (I added a bottom band instead of a turn-up hem, which is the slight modification.) I also have a short-sleeved jacket from this same fabric so I guess I have an actual suit now too.


I really like this top. It's easy to sew, feminine, flattering, and comfortable to wear. Especially after too many holiday treats. ;-) The pattern is a winner, both for style and drafting. The only alterations I made were to move the bust dart down and to fiddle with the shoulder seam in the raglan sleeve to fit my square shoulders. Even with what I thought was an adequate pattern adjustment from the muslin, I still ended up with a poof at the shoulder and so I just sewed the poof out in the real fabric and will adjust my pattern to match, hopefully tomorrow night while it's still fresh in my mind the pattern is still laying on the floor. Oh, I also added about 1-1/2" to the bottom length and kept it. I wanted this top a little longer in case I want to belt it.

There's not a lot of waist shaping in the pattern, but with a drapey fabric such as this, it still hangs nicely. In fabric with more body, I might want to add back waist darts or curve the sideseams inward. Either of those is easy to do as a final step, so I won't alter the pattern.


What drew me to the Mimosa was the tie coming from the raglan seams. And then I went and chose a fabric that completely obliterated this design feature. If I had been more forward thinking (i.e., before I had sewn, trimmed, and turned), I would've piped the ties. Instead, I used narrow purchased bias tubing from the stash. And now the ties are visible again.


I used purchased black bias binding for the back neckline and sewed on the front facing last and different from the pattern instructions, so that the front raglan seams and bias are caught in the facing and covered. Hard to explain, but a little cleaner finish this way. Although a slightly bulkier finish too, so I'm still undecided on what I'll do next time. And, yes, there will be a next time. I really like this top!


I'll share the minimal alterations on my pattern pieces next time.

Saturday, December 28, 2013

Slow Start

I have been sewing, just not as fast and constant as I want. I'm blaming Christmas dinner hangover. Ugh. I feel like I've gained 20 lbs this month. I haven't, but I haven't been very good either. I *know* what my New Year's resolution will be, and I don't even usually make resolutions. But I want to fit into ALL of my clothes again and now that I'm settled into my job, the pity party (read: food medication) is over.

Wednesday night, Alex was whining (not really) that his purchased key lanyard had met its demise. I'm not sure exactly when he started wearing his keys around his neck, but whenever it was (probably at least as long as he's been driving), he's been doing it ever since. Having to put his keys in his pocket Thursday morning threw off his entire workday zen/balance. Overly dramatic much? Hahaha.

So, sewing mom and stash to the rescue of course! Grosgrain ribbon? Check. Key fob hardware? Check. (Yes, really ... and I even have more.) Tag to disguise a mom-sewn item? Check.


My choices for wide-ish grosgrain ribbon in the stash were limited. I needed one I could fold in half (for strength) and which was not entirely too girlie. This brown/aqua stripe fit the bill best. The unpressed ribbon is on the right below. Cutting the length of ribbon, pressing in half, and then stitching the halves together and over/through the hardware took all of about 10 minutes. 15 tops.


A thread change and then sewing on the label cut from some old pair of jeans years ago took another 2-3 minutes.


And that was the extent of my Thursday sewing. But all was right in Alex's world again as he left for work Friday morning. And he even likes this hardware better than the lame clip of the purchased version. So I call that a sewing win, even if it was only 20 minutes.

Yesterday, having had success with the SBCC Tonic tee, I bought and downloaded the SBCC Mimosa top and muslined it. Both for fit and for construction testing.


The 16 PDF pages for this top were also to be butted together when taped, instead of overlapping, but the "missing bits" of the pattern lines were easy enough to fill in where needed. Even though I did pay for this pattern vs. the free Tonic, I still didn't really mind filling in the lines since the butting up/taping is easier than trimming 2 sides and then overlapping sheets. In other words, this method was a lot faster and I think even more accurate in the long run. For the Mimosa, the separate pages/tiles of the PDF print-out were also numbered so there was no guessing as to what page went where if the printed pages happened to spit out of the printer out of order. Which they did with the Tonic. Ahem. My fault on that.

Before I get into the fit of the muslin, I want to mention a few observations. First, if you look at the coral Mimosa from the SBCC website above, you should notice a back neck facing. It doesn't exist in the final pattern. Instead, there is a pattern piece for bias binding. I think this is better. But don't expect instructions for attaching it. As I mentioned with the Tonic, these are not learn-to-sew patterns. In fact, there's not even a cutting layout given. Which I actually like since I never follow suggested layouts anyway and it saves on printing output too. Grain and fold lines are marked as you'd expect, which is all that's really needed.

The instructions are fine (with one semi-mistake, noted below) but they are in bitmap format instead of a vector PDF. If you don't know the difference, in layman's terms ... a bitmap is like a digital photograph where resolution (file size and pixels) counts, and if resolution is too low, you won't be able to print a clear (unpixelated) rendition. This is the case here. I hope the pattern designer is reading, because I want to suggest that she keep the instructions in the infinitely scaleable vector format and save as PDF, like the Tonic instructions, because the print-out as-is is only so-so. Readable, but blurry. And so easy to make perfect if staying with vectors.

Onto the muslin.


Overall, pretty darn good for a first muslin and the top looks like I expected from the SBCC website. I cut the same sizing as for the Tonic ... which was a straight XL for all of the front and back shoulders/neck/arms, then blending to XL+1/2" for the back bodice starting below the armpits. I did not do an FBA and there is plenty of bust width/length for me. But the bust dart is pointing about 1-1/2" too high for these non-perky girls. That's an easy fix and I've already box-cut around the dart and moved it down on the pattern to be ready for the real fabric today. I also cut the pattern the full length of the biggest size because the hem allowance is only 3/4". I think I might want another 1" and will cut the next one with that additional length to see. I anticipate that most of that will be used as hem allowance, since I prefer a deeper hem.


While my bra straps are technically covered, the neck opening still feels a little wide over my shoulders. I added about 3/8" to the width at each shoulder for the next make, and will show the altered pattern piece when I show the final fabric top. Lastly, as far as fit, the dart in the raglan sleeve poofed on me, because I didn't make a square shoulder alteration for the muslin. I've now done that for the next make (same pattern piece to be shown next time).


The semi-mistake in the pattern that I mentioned above is the mark for where to place the ties. It's just not in the right place to allow for the seam allowance to attach the facing. (The sleeve notches don't match up to the bodice either, but that may be as designed ... IOW for identification only ... since you're never instructed to actually align the marks.) As long as you remember to ignore that mark for the ties and just place them lower with the seam allowance in mind, you'll be fine.

Finally, I also think I may change up the sewing order and attach the front neck facing before I've attached the back bias but after joining the front raglan seams (did you follow that?), because as you can see in the 2 photos above, my joins are not exactly even. :-) I'm still thinking on this and probably won't make up my mind until I'm actually at the sewing machine with the real one.

Which is where I'm headed now ...


Thursday, December 26, 2013

SBCC Tonic Tee


This is my Christmas outfit. And my little photobomber. We were quite casual around here today. Hello wrinkled shorts. :-) What's all that green stuff, I hear you northerners asking. Why, that's grass and tropical plants. Hee hee. No White Christmas here. But then I'm guessing you also weren't dripping sweat as you pulled the Christmas ham from the oven. ;-)


This is the fit of the Tonic, pretty much out of the "envelope" ... (pssst ... there's not really an envelope since it's a downloadable PDF). After deciding on size (more on that below), the only change that I made, and kept, was my square shoulder adjustment which I made before cutting the pattern. I also added 2 inches to the bottom length and 1 inch to the sleeve hem on paper, and then ended up cutting both off in the fabric after sewing the sideseams and trying on the tee. So, while at 5'5" I'm not technically a true petite, I am a petite in the chest, shoulders, and armholes. Something I've known and usually have to adjust for in other patterns. Armholes are ALWAYS too low on me as drafted, but not this one! How nice. Also, no FBA was done or needed.


The photobomber strikes again.

The sewing instructions are simple/easy but really good and very nicely illustrated. Some PR reviewers commented that there is no instruction to stabilize the shoulder seams, but this is NOT a teach-you-to-sew pattern so I'm OK with that. Besides, I don't stabilize every shoulder seam I sew anyway. It depends on the fabric. (I did use Design Plus on these shoulders.)

(Mini rant ahead.) I'm of the opinion that you if you're serious about your sewing projects, you should be serious about educating yourself. In other words, reference books either purchased or borrowed from the library, videos, classes, sewing friends with a little more experience, and even free blogs and YouTube. Yes, it's nice when you learn something new from a pattern or blog but I don't expect to learn it all from one place at one time and I always give myself permission to use a different method than a pattern instructs if I know what works better for me or something just isn't making sense. Just jumping in as a newb to start is great, but after dipping your toe, knowledge is power. I feel empowered and much more confident when I've equipped myself with information before I start a project.

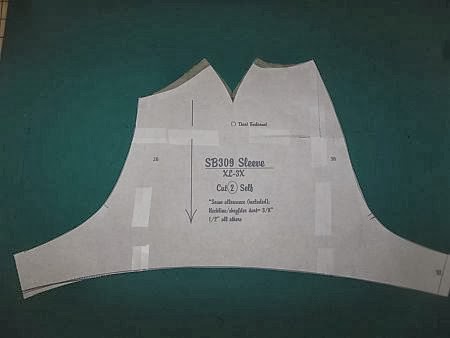
So, back to the pattern. The only quibbles I have is with the print-out of the pattern. I'm really glad I read the PR reviews first, because I probably would not have caught that the individual sheets are to be butted up against each other instead of overlapped as with most other PDF patterns. But since most home printers don't print to the absolute edge of the page, some of the pattern lines go missing. On this simple (and FREE) tee, it didn't bother me at all. But I'm not sure if I would feel quite the same on a more detailed pattern. I think it really would depend on how the layout landed on the page tiles. But on the other hand, I LOVED not trimming the pages and overlapping before taping. This pattern printed in 16 pages and I had it off my printer and taped in 30 minutes or less.


Once I had it taped together, I got out my TNT Ottobre tee, which has been my Holy Grail of tees and tee morphs for years now. My Ottobre is NOT from a straight tracing out of the magazine. The pattern was a good foundation but there was also some finessing to get it to Holy Grail status. So, to see how similar the Tonic was hot off the printer was a very nice surprise. And a little bit of a shock. ;-)


I traced a straight XL (from the Curvy Chick side of the size range) for the front. For the back, I blended from XL at neck/shoulder/armhole to XL + 1/2" at the hips. The 1/2" is pretty much right in the middle of the XL and 1X, and was where my TNT "told" me to blend. The waist shaping of the Tonic lined up well with my Ottobre, which told me the SBCC petite body length would work for me. As I mentioned above, I added 2" to the bottom which I ended up cutting off. But I always cut my tees too long because I want the insurance I'm too lazy to just measure. Even my TNT pattern has the extra length on it, as you can see above.

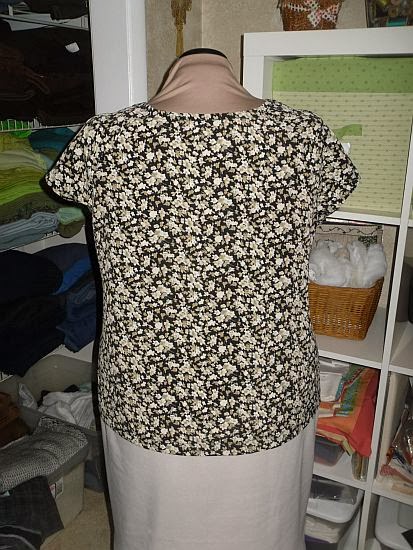
Overall verdict: Winner winner chicken dinner! It fits great out of the envelope, nice instructions, and it was free!! What more could you ask for? Oh, the link, you say? Well, here it is again: SBCC Tonic Tee

Before I sign off for some sleep before starting my woooSEWCATIONwooo tomorrow, here are a couple of tips for sewing the neckband of this tee (and others, as applicable):

The pattern comes with a piece for the neckband, to be folded in half WS together and pressed flat. It is intentionally longer than the actual neck hole. You are instructed to leave one shoulder seam open so you can apply the neckband in the flat. (I don't mind the minimal extra bulk at the last-sewn shoulder seam. I do this all the time when using my CS binder.) You are also instructed to gently stretch the neckband around the tighter curves of the neck opening. This is all well and fine. But what if you don't know how your neckband fabric is going to behave?

Well, get out the pins!

Put the tee on your sewing table, not your lap, so you can work flat and eliminate fabric dragging down with gravity. Leave a little "grabber" end and then start with one pin at the open front shoulder. (If you leave the right shoulder open, when you sew on the neckband you'll be sewing the already-sewn/serged left shoulder seam allowance to the back naturally as you go over it, instead of trying to wrestle that seam allowance and the neckband at the same time.) Then work your way around the neck opening 1-2" at a time, gently stretching the neckband as you go. Don't stretch enough to create actual gathers and curls in the tee fabric, but only enough to create gentle waves.


Now here is the scandalous part. Leave the pins in and SEW OVER THEM. Sew from the top so you can see the neckband and keep your stitching even on it so you'll end up with an even band, and just sew S-L-O-W-L-Y and steady, leaving the needle down if you need to adjust as you go. I guarantee that as long as you are sewing slowly and steadily, your needle will not hit a pin and instead it will work its way around a pin to find the fabric, just like it's actually engineered to do. You only break needles when sewing over pins at Danica Patrick speed.

Below, you can see the backside with my stitching ... and the pins still in place. I practice what I preach. ;-) Most of the time I don't use this many pins but the print is a poly knit and the neck band is rayon/Lycra and they just weren't behaving nicely together. It's a lot faster to just pin the suckers down than to fight with them on the sewing machine, so sometimes I do actually use a crap-ton of pins. As with most everything in sewing, it just depends.


Another tip ... leave the tails at the beginning and end until you've sewn the second shoulder seam. It will give you something to hold onto when starting or ending the seam.

Final tip of the night ... press the seam allowances to the tee with steam and then lay your clapper on the front neckband until it cools to create a shape memory in the fabric (before topstitching or edgestitching). If you don 't have a clapper, something heavy but porous over a press cloth works too. It has to be porous so it can absorb the steam/moisture.


And, t-t-t-t-hat's all folks. Good night!


Tuesday, December 24, 2013

All I Want For Christmas ...

... is 5 days off from work to sew.

Ba-da-BING! Wish granted. :-)

Yep, our office is officially closed until Monday. Can I get a woohoooooo?

Our "deal" was that instead of leaving early on Christmas Eve (today), we'd have the Thursday and Friday afterward off. (Personally, I love that deal!) But someone must've dipped into the Elf Juice early because at 10:00 a.m., word came around that the office was now closed and we could go home until Monday. Can I get another woohoooooo?

So, what's a sewing girl with some extra Christmas bonus cash to do? Well, I thought about stopping in at Joann's ... I do need those buttons to cover to finish Ms. Moneypenny ... but I quickly put that store out of my mind since it's right across the street from the Mall ... a place I strive to avoid most of the time anyway, but especially in December, and ALWAYS on December 24. Ms. Moneypenny will have to wait a little longer.

And then I remembered a free pattern download I wanted to try before I buy a for-sale pattern. Enter the Skinny B*tch Curvy Chick Tonic Tee (hey, I didn't name the company and really, I'm not offended at all, but some of you may be, hence the asterisk).

I really like the Mimosa but since there's a free tester and I have some free time, I thought I'd give the Tonic a whirl first. Then I'll feel better about parting with some cash (and tape) for the Mimosa.

I'll let you know what I think ... but I have to mention that before even starting, I had a little problem with downloading and Betsy, the designer/owner of SBCC, answered my email within an hour. And on Christmas Eve! Nice!

I've since printed and taped the PDF pattern and have my TNT laid on top. It looks very promising.


Merry Christmas everyone! I hope Santa brings you everything on your list.I might be doing a little online fabric browsing shopping tonight while Rudolph makes his rounds.

Thursday, December 19, 2013

What's on me, What's on Zillie


What a difference a week makes in temperature. We Floridians have had to bundle up all week. Brrrr. Seriously, it was 39 this morning. (Do you think I can convince Peter to put ME on his Coatmas list??) The good thing (if there is a good thing about 39 degrees in Florida) is that it quickly warms up to the 70s/80s during the day. It will warm up again by next week but we'll still have a few weeks of cold coming in January/February. That's about all I can take of "winter" anymore. Twenty-five years in the Sunshine State has me spoiled.

I remembered to check my camera this time and it looks like I'm in focus again.Yay! Even I was getting tired of that blurry pic from the last post being what I saw here. It was just a silly dial that I must've nudged inadvertently which threw off the camera's focus setting. Silly, maybe, but oh-so-important.

I'm finally wearing the turquoise Sophia knit skirt I made last month, using ol' standby KS3287. Love this pattern!  I even had an unsolicitation from one of the partners today. Gotta love those.


This week Zillie is wearing an in-progress Hot Patterns Miss Moneypenny. You may think my camera is acting up again, but this time it's the fabric. It's a dotty satin which photographs like crap from a distance.I started it this past weekend and still have hems and buttons/buttonholes to do. I'm thinking covered buttons, which means a trip to Joann's, which means waiting for payday (tomorrow).


This is the fabric close up.


And this is what it looks like a little farther away. I'm not sure if I like all that shine, but I'll probably wear a cardi or jacket over it, so the shine will be toned down somewhat.


This is the pattern. Hot Patterns has it on clearance right now for $7.95. Go buy it here before it's too late! I promise I am NOT being paid or otherwise compensated for saying this. I bought my own copy a couple of years ago, and reviewed it on PR here, with links to photos that show alterations, etc. It's one of HP's earlier releases so the instructions are a little bit obtuse and/or quirky in spots and they are not illustrated, but the pattern itself goes together nicely with few alterations even accounting for any quiggles I noted in my PR review. But the bottom line is it's a flattering and feminine vintage style with a modern edge, which I think has staying power in most office wardrobes. Have I convinced you yet? ;-) Hurry up before it's gone forever.

Wednesday, December 11, 2013

Baby, It's (NOT) Cold Outside (Simplicity 2187 modeled)

While Peter is working on his pea coat (a garment we hardly recognize around here), and doing a beautiful job I might add ... it was a balmy 82 degrees here today and, so, totally appropriate for nearly sleeveless and bare legs. Sorry all you northerners freezing up there.

Um, not really. ;-)

Unfortunately for the blog, I forgot I had a blurriness problem last time and thus forgot to check my camera this time so we have blurriness here again. Ugh. But I think you can still get the general idea, even if not in a crystal clear rendition.


It's a comfortable dress but not my most flattering since my waist gets lost in the blouse-i-ness of the  bodice and no-contrast waist sash.


I still love the print and colors so I'll continue to wear it, missing waist be damned. ;-) Besides, who needs a waist anyway this time of year with all the goodies floating around the office kitchen?


Plus, pockets! Gotta love those!

Tuesday, December 3, 2013

CJ Patterns #426 Princess Wrap - As a 2-Piece Dress


The CJ Princess Wrap top is done, along with a modified Magic Pencil skirt to make a 2-piece "dress." I don't have any FBA instructions or pics for the top since I didn't need/make one. In fact, the only alterations I made were (1) square shoulders and (2) adding about 2" of length at the hemline. Style changes were binding the neckline with a binder on my CS machine instead of turning under and topstitching per the instructions, and to lengthen the short sleeve to 3/4 length. There is a long sleeve pattern piece, but since the short sleeve was already cut, I just used it and cut the fabric longer. (More on the pattern and sizing below.)


In the pics above and below, you can better see the gathered wrap and the bound neckline.


The Magic Pencil skirt was modified to a flippy-er and more A-line shape per a Neue Mode pattern made earlier (I'm too lazy to link to that post right now ... maybe later) and incorporating modest side slits.


CJ's sizing is different from other patterns, since she sizes for UNwashed natural fiber knits and expects some shrinkage. I don't particularly like this, especially since I was using a non-shrinking poly knit (a matte jersey from Fabric.com bought a couple of years ago), but CJ does include lots of sizing information on the instruction sheets which makes it easier to pick a starting size based on your ease preferences and fabric choice. If you're unsure, take the time to make a "down and dirty" knit muslin ... or at least don't use your best fabric the first time. For me, I had already made this top (altered bigger beyond the pattern back then) and still actually have it so I could try it on for a better idea of my current size. Plus, I have a lot more fitting experience since I first bought the pattern and a TNT tee pattern to compare with. Both of those, plus the excellent sizing tips included in the instructions, certainly eliminated any outright guessing.

Below, is the hint sheet for what to do when you're between sizes.


And this is a close-up of the finished garment measurements sheet. Since the *finished* bust measurements of the size LG are just about my true full bust measurement and I knew I didn't want extreme negative ease in this top, I traced between the LG and XL for the vertical seams and it worked out perfectly. You can also see that the finished bust measurement for this top is inches bigger than the hip measurement in all sizes, which to me means that this pattern is geared toward the busty. A good thing for me and it meant no FBA was needed (even on my first make when I was bustier). Sorry that I don't have any real help for you on a FBA Rebecca Grace ... but since it has princess seams, if I needed an FBA, I would just distribute additional fabric needed among those seams and  panels.


This is the whole sheet showing finished measurements for all of the patterns CJ was selling at the time I bought this one (years and years ago). There have been patterns released since I bought this pattern so I'm not sure if the paper measurement sheet has been updated to include all of those too. But all patterns are included in a PDF download from the website, here.


In addition to all the measurements and sizing tips, there's also a section that explains the ease in CJ patterns, which I think is extremely helpful for accurate sizing choices.


The actual sewing of the pattern is a breeze. It's drafted beautifully, with notches where they should be and which match up perfectly. The sleeve fits the armhole with no easing. The neckline sits in a nice spot, not too low. The shoulders stay a normal length vs. linebacker in the larger sizes. The instructions are good and well-illustrated.

The only complaint I have about the actual pattern pieces is that they're drafted with 5/8" seam allowances everywhere. This is OK for fitting insurance on the vertical seams, but too wide for sewing in a knit sleeve without tons of pins and/or adjusting fabric every few inches. I've already noted on the pattern to trim those seam allowances down to 3/8". I may even get a wild hair and trim them before I put the pattern away. ;-)

And a semi-complaint is the neckline finishing instructions, but a complaint only on behalf of others. Turning under and topstitching is OK if your fabric is not prewashed and will shrink. But if it's been through the laundry or is a non-shrinking synthetic, you're probably going to need some sort of stablizer/elastic with such a long wrapline in order to prevent gaping. (My CS binding utilizes a differential feed to eliminate a saggy neckline.) An experienced sewer will know this. A beginner may not. But then, while this pattern is easy to construct, I don't think it's necessarily actually aimed at true beginners. That's not to say a beginner shouldn't try it. Just that they may need additional techniques in their sewing arsenal.

I'm already thinking about trying the other top in this pattern, and wishing I had gone ahead and ordered one or two others during the sale. I forgot how much I liked this pattern.


Friday, November 29, 2013

Found!

So, I got off work at noon on Wednesday (nice!). Stopped by the grocery store for a few things NOT Turkey Day related, and then came home to clean up the house before Tyler's arrival.

Vacuumed the family room, the kitchen (pre-mop), the living/dining rooms (barely, since no one ever goes in there), my bedroom, and finally ... the sewing room, which was in dire need what with the layer of thread (and pins ... oops) covering the carpet.

While in there, I made my way with the vacuum into the corner with the mirror, where I had laid down a pattern (which shall remain nameless) to deal with putting away later. As I bent over to lift it  up so I could vacuum under it, I spied the corner of another pattern. "Hmmm ... what is that?" I wondered. You know what's coming, right?


Shuffle, shuffle ...


... the missing Christine Jonson wrap top.Yay!!!


Geez ... getting old is rough. Not only did I "lose" the pattern for a bit (which I have NEVER done before), but I have no memory whatsoever of taking it out, pressing it flat, and then apparently laying it aside on the floor.

But at least I found the pattern BEFORE I ended up ordering it again, which would've been today during the last day of the sale, even if somewhere along the way I seem to have misplaced my brain. (BTW, you can order CJ Patterns from Pattern Review and they will ship internationally. I'm thinking CJ will also ship internationally since the PR sales ship direct from CJ. Maybe worth another inquiry if you're interested.)

Thanksgiving yesterday was fun. Tyler arrived around 8:30 Wednesday night, with (surprise!) another Marine. By Thursday morning, he had (surprise!) another friend here too. Around noon, two of Alex's friends showed up (not a surprise). We pretty much doubled our expected eaters since Tyler himself was last-minute. And even though I actually reduced my usual quantity of food bought and prepared, we STILL had a TON to eat and now a TON of leftovers in the fridge. (But I do love me a turkey sandwich.)

Tyler, friend, and Alex are taking off for my stepson Michael's over in St. Augustine tonight for a night of barhopping and whatever 3 brothers do (I intentionally don't ask for details), with Alex returning home tomorrow night sometime and Tyler/friend going northward back to base.

Which means I will have a day alone for just me and the CJ Wrap. Hoping the mojo stays hungry ... we have patterns and turkey to get through. And pie. ;-)

Parting shot - As promised, the HP top and the (wrinkled from being at a desk all day) KS skirt after work this past Tuesday.