Monday, September 25, 2023

Quickie Update

I was able to get the Chalk & Notch Fringe dress pattern put together and cut out on Friday and over the weekend. I even started sewing it yesterday.
So far, so good. But I think I hate the fabric and if I continue to hate it, this will be a muslin/toile. The fabric is more lightweight than I was expecting, which I could work with, but it also seems kind of low quality. By that I mean that it just seems like it will fade and show wear fairly quickly. Just a hunch. Hopefully, I'm wrong.

The pattern, on the other hand, seems good. Everything is going together nicely so far. I do have a few opinions (surprised?) which I'll detail whenever I make a final post about this dress. Nothing really bad at all — just my own preferences on some things. 

So now that the sewjo is back, I'm seeing all sorts of things I want to make and there's not enough time in my days. One thing on the short list is this Double Vision glasses case for toting two pairs of glasses in one case. I'm always juggling between my prescription sunglasses and regular glasses and it would be nice to have a pretty single case instead of two ugly boxy ones. The boxy ones are good for protection but I'm not actually going anywhere where I'm slamming down my purse, so an interfaced fabric case should be fine to protect my eyewear from lens scratches while inside my purse. I'm not sure exactly how I ran across this pattern, probably from looking at the designer's sewing room tour on YouTube. But the pattern is only $2.95 and the video tutorial looks like it will be a fast and easy project. Also, good Christmas gift for my sister. I'm not affiliated or anything — just sharing. Wawak has all the interfacings/notions needed, which I ordered (and which brought the cost of the $2.95 pattern up substantially. Haha.). I'm sure I have plenty of quilting cottons in the stash that will work fine for this so at least I'm "saving money" on that part. 
Parting shot: My table in the midst of a project. I need to figure out a second surface for this room so I'm not constantly moving things on/off the cutting table. Maybe a bookcase to the left with a couple of empty shelves for in-progress stuff. I've already filled up the shelves below the table. 

Wednesday, September 20, 2023

What's New?!

I haven't done any actual sewing since my last post, but I have done some sewing adjacent activities.

I've been working on the Chalk and Notch Fringe dress. First was assembling the PDF. This is NOT a no-trim pattern. Boo. I spent an evening in front of the TV trimming the pages. Yes, I know I could do the "fold a corner thing" but actually trimming gave me an excuse to do something sew-y that didn't take much brain power. 
I left the TV to assemble the pages and sort out which pages/pieces I needed and which I didn't. Thankfully, I can use my office printers and not worry about ink or paper because there were a LOT of wasted pages, like 10-ish or so pages just for interfacing patterns and 5-6 that ended up being blank after turning off smaller size layers. I don't use/need interfacing patterns and I either just block fuse (preferred) or I use the actual pattern pieces. I certainly didn't need to print interfacing patterns for a bunch of different sizes but I found the "key" for which pages to print kind of fiddly and/or my brain just was not on full power. I generally print ALL the pages (thanks office!) and the sizes around my general base size and then I sort out which of them I actually need to put together. 

The fabric I'm planning to use is below. It's the Fabric Mart navy blue/dotty rayon from one of my last posts, which is now hanging over my chair since I pre-washed and pressed it.
The big (BIG!) sewing-adjacent activity (previewed on Instagram) was bringing in my Designer 1 for service (finally!) and also coming home with this. 
Meet my new toy! It's not a top of the line anymore but it's certainly at least 50 steps up from my Designer 1. It's weird (and not gonna lie, still a teeny bit annoying) to have to wait for my sewing machine to boot up. But it's also very cool to have a 21st Century sewing machine. This one better not die before I do. Not that my D1 is dead — I expect to pick her up in a couple of weeks.
I went into the store set on a Topaz 50. But there were a couple of quirks I just wasn't thrilled with. Silly, minor things but things that would bug me nonetheless. Don't get me wrong, the Topaz is an excellent machine and I almost came home with one but … I spent a good 2+ hours in the store (an independent fabric store slash Viking/Pfaff/Singer dealer) and the saleswomen were very patient with me, letting me go back and forth between machines and do whatever I wanted with no pressure, and in the end, the owner/saleswoman dropped the price of the Sapphire 85 considerably lower than what I have ever seen for a new OR used one and that pretty much sealed the deal for me. If you're ever in my area and need a new machine or sewing stuff, I highly recommend Fabric Warehouse in Lakeland. (Side note and probably one reason for the extra good price on my Sapphire — There's a new Designer Epic 3 coming out next month that's going to cost ~$25K. It's quite a machine from the previews but for that price, it had better drive me to the fabric store too.) 

Here's the internet on my new machine. Well, sort of. I haven't actually created my account yet.
Here's the regular stuff.
All of my Designer 1 feet and accessories are 100% compatible, including embroidery hoops, which is great news because I have about every foot made and it's nice to not have to re-buy them. But I knew that before heading to the store which was another reason I stuck with same "family," the main reason being I'm just a Viking girl.

But there are some Viking feet I didn't know about until I started looking at new machine stuff, including an "interchangeable" walking foot. It's just like a regular walking foot except there are specialty feet options, such as an edge joining foot, a 1/4" guide foot, and others, so you can dual feed AND precisely topstitch/edgestitch at the same time. Cool, right? I'm not sure how often I'll actually need it, but I was stupidly happy one was included with my new machine. My name is Debbie (hi Debbie!) and I have a machine/accessories problem. ;-) 

I'm hoping to get my dress cut out before the weekend so I can actually SEW for real on this new machine. I will not be shopping for a while. 


Tuesday, September 12, 2023

Niagara No. 3

Continuing on with the (unplanned) turquoise and navy theme of the month, I made my third Pattern Niche Niagara top in stash ITY knit from Fabric Mart (I think).
For this one, I extended the cut-on-fold pattern pieces so I could cut flat in order to center some of the motifs in a more pleasing manner than willy-nilly. I'm not going to lie - this was a Royal Pain in the Arse since I had 4+ yards of this fabric and wrangling the slipperyness and weight of it over my cutting table and then cutting the big pieces was a Chore. But it all worked out and I'm happy with the design placement (although I could be a tiny bit happier with the lower front bodice but I wasn't about to re-do it for something no one but me will notice/care about.) I do love how the back yoke turned out.

This fabric has a border print along each selvedge and I decided to take advantage of it for both the neck binding and by adding sleeve bands.
To go along with my blog return, I also cracked open my Instagram account yesterday and posted a couple of these photos, noting that my binding skills seem to be like riding a bike. Whew! I don't, however, think my current bike riding skills are like binding with a coverstitcher. ;-) 


Part of the "skill" is using scraps of fusible interfacing on the binding strips to give them a bit of oomph and to prevent the edges from curling. Match the direction of stretch in the interfacing to the crosswise stretch of the binding.
I guess I've been in a hole, but apparently quilters are using coverstitch binders on their sewing machines to attach quilt bindings? Of course, the sewing machine companies aren't calling them coverstitch binders and are selling them at high dollar with specialty plates so the binder can be attached to the sewing machine. Interesting. Anyway, I saw a tip in a You Tube video (13:15 mark) to use an awl between the foot and binder to help guide the binding, as shown below. It's a good tip and I highly recommend it when coverstitching a binding on.
Are you Team All The Pins when you attach gathering to a non-gathered piece? I say the more the merrier and sew very s-l-o-w-l-y over them. Next up will be a skirt to match this top. I'm not sure of the length yet (probably midi so I'm not a complete walking wallpaper) but I do want to try to incorporate more of the border into it. There's now less of the fabric to wrestle so hopefully cutting out will be a little easier.

Sunday, September 10, 2023

A Bit of Shopping

I am truly and well back into the sewing thing, as evidenced by my recent shopping sprees. Yes, I have two cabinets (plus some bins in the garage) full of fabric. Does that stop me from adding to the collection? Nope. I feel I'm preaching to the choir.

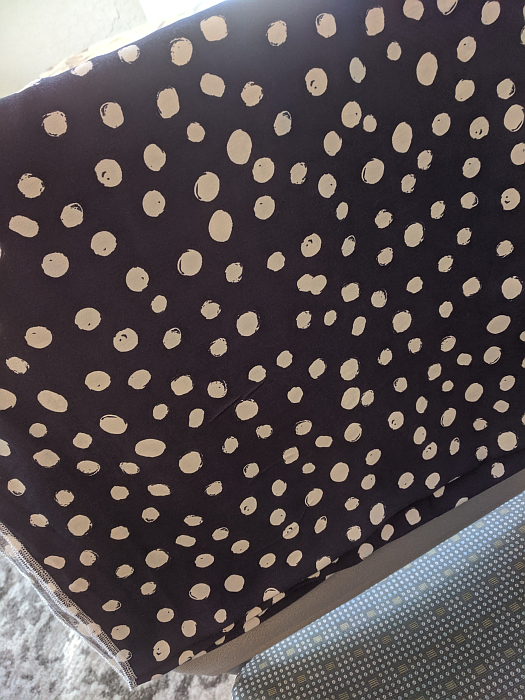
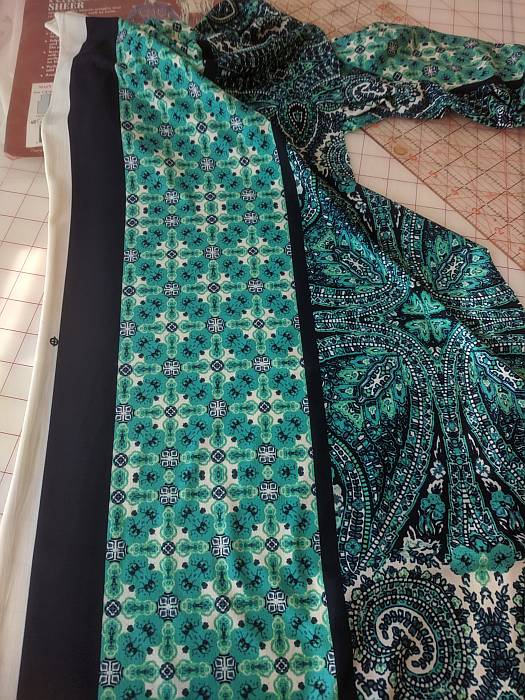
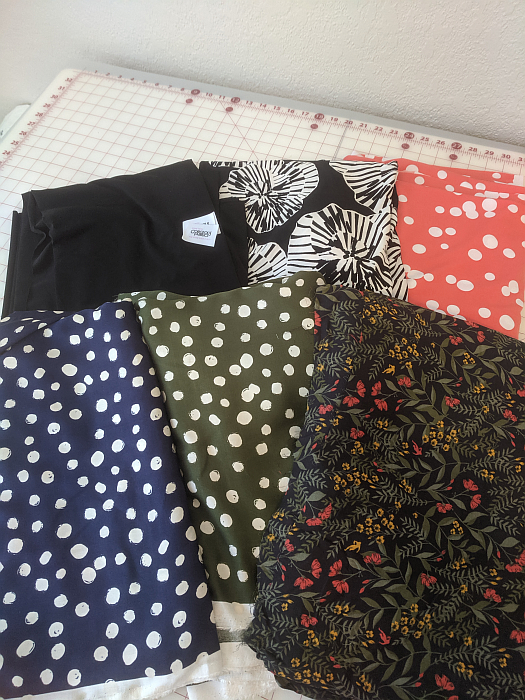
In the top row below are ITY knits purchased from Gorgeous Fabrics. The solid black will become a top of some sort. The b/w print a top and skirt. And the coral/white dots likely another top and skirt. The bottom row are all rayon challis purchased from Fabric Mart. They are bit thinner than I was expecting, but they will still work for tops and dresses. They are being prewashed as I type. I hope to stay away from further fabric purchases since I really have more than enough and I actually WANT to sew some of the stash so I can finally wear it. But I had to dip my toe in a little bit to get the sewjo into high gear. That's my story and I'm sticking to it.
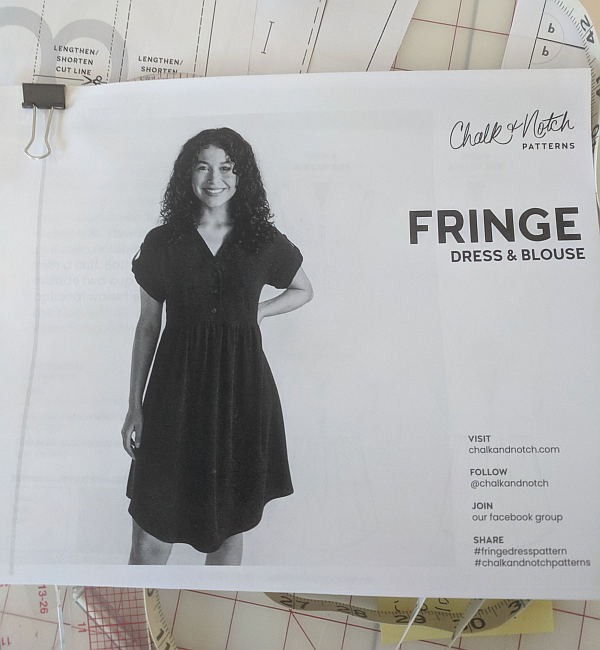
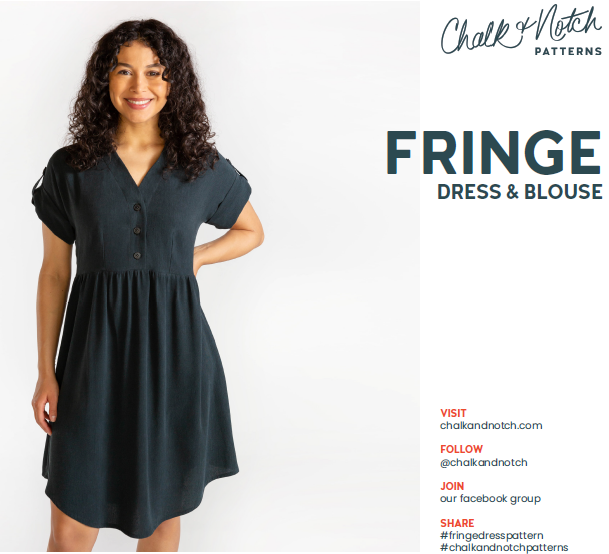
I also went on a bit of a PDF pattern buying bender. I now own the Chalk & Notch Fringe, the Itch to Stitch Nittany, and the Love Notions Saltwhistle. I will print them when I'm in the office next week, because free office printing is one of the perks of actually going into the office.

The Fringe will be first up in the woven category but not until I've sewn another knit top currently in the works (see below). I will definitely have to muslin this one and I'm sure I'll be adding length to the skirt and straightening the shirt tail hem. 
The Nittany below has neckline pleats which are impossible to see in this print. There's also an option for a keyhole in the middle of the pleats. Not sure which option I'll try, but this will be another I'll have to muslin.
And finally the Saltwhistle, which was on a $5 Friday sale. I'm not in love with the scallops, especially as tiers, but I do like the square neckline. I'll likely make a dress version with short sleeves. I'm sure I'll need a muslin for this one too. At least in Swedish Tracing Paper if not fabric.
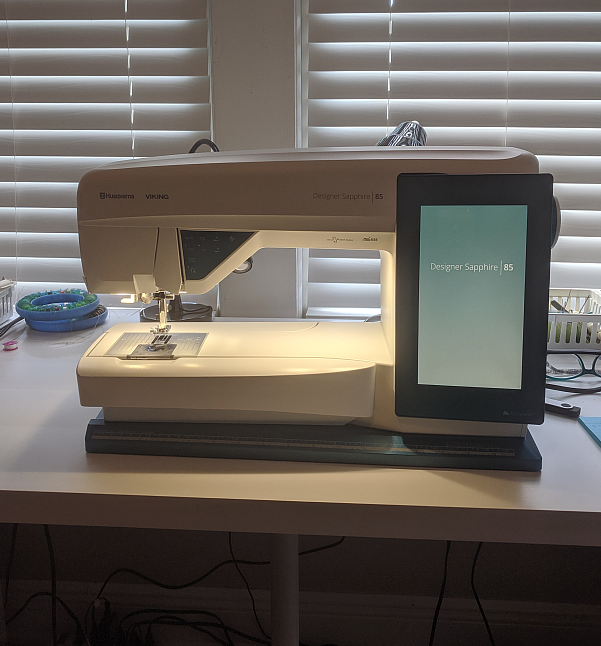
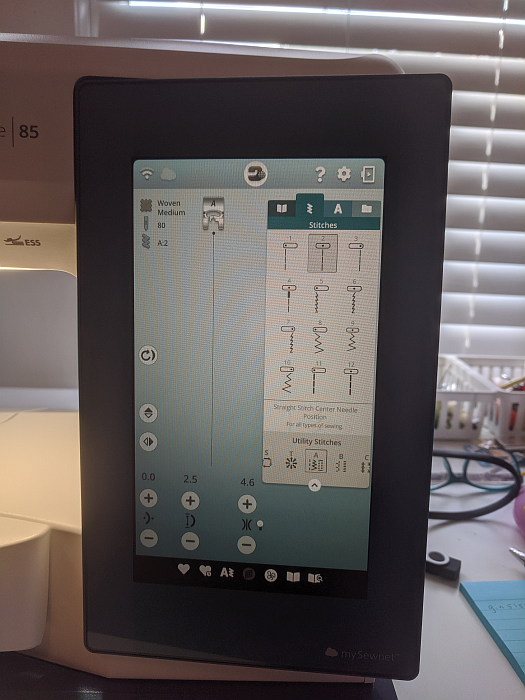
The biggest purchase is a sister for my Designer 1. But by "big" I mean a mere fraction of what I paid new for my original D1. I paid nearly $5K for my original about 20 years ago. (Gah, How has it been that long??!) I paid $170 on Ebay for its sister. Sister seems to work very well, but it does have a couple of issues that will need to be fixed at the local repair shop. 
First, the thread cover broke off in shipping. Well, one of the hinges holding it in place. (My original D1 with the thread cover flipped up is on the right, the "new" one is on the left.) Second, the auto thread cutter "thingie" is completely missing so it doesn't cut the bobbin thread. This missing piece wasn't mentioned in the listing and the seller has not responded to any of my inquiries, so Boo on that. But the machine itself seems to work well otherwise so I'm going to keep it anyway and just get those things fixed and still feel I got a good deal. I can snip threads with scissors until then.

You're probably wondering why I bought a SECOND machine exactly like my original? Well, the truth is that while I ADORE my D1, it has some things that need fixing too and I've been just limping along for YEARS instead of bringing it in for repairs. I just haven't wanted to be without it while it's in the shop. Yes, I haven't actually been sewing for the last couple of years so I could have EASILY been without it (and I do have other "vintage" machines), but sewing and machines were not top of mind. Now that they are again, I just decided I must have a comparable backup. And well, just because. :-) I thought $170 was a reasonable backup price, not that I don't think my original was worth every penny I paid because it was/is and I still love it.

It's going to be a shock to be sewing with a working reverse, a light over the needle, and a fix button that I don't have to trick into working by re-selecting my stitch every time I want to end a seam. Yes, I have been sewing without a reverse for years. How ridiculous pitiful lazy is that? 

So my plan is to bring my original D1 into the shop next weekend and keep its sister at home to sew. Then I'll switch them when my baby is ready. I also might want to look at some new machines. Ahem. I never did spend that Pandemic relief money so who knows? 

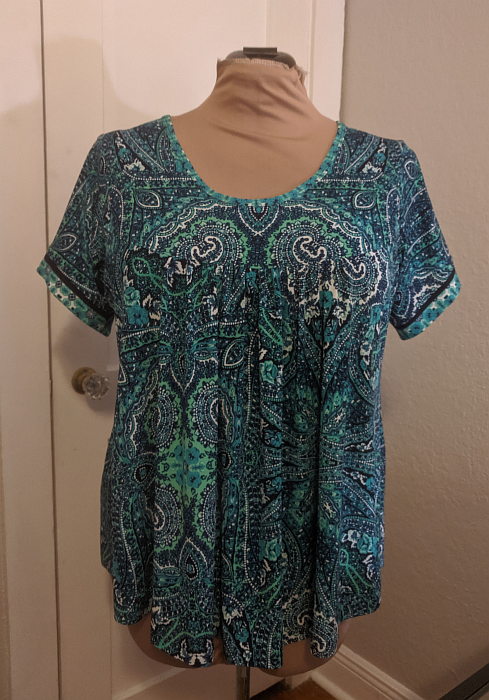
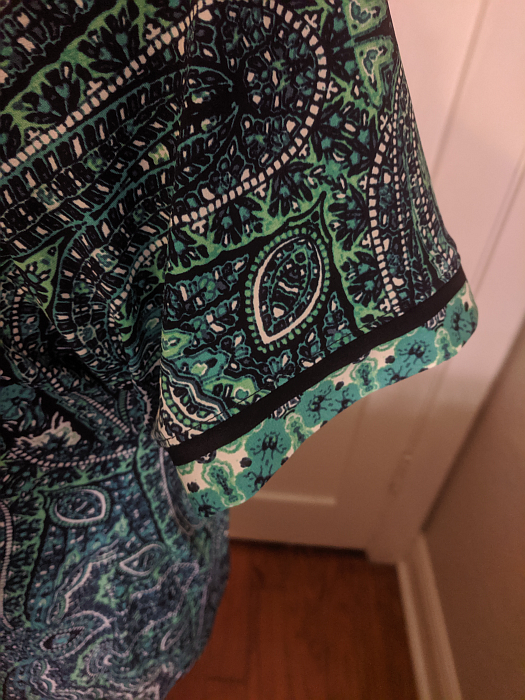
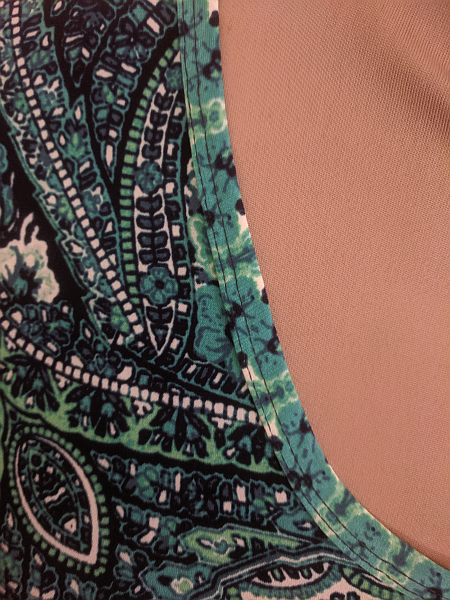
Currently on the cutting table is another Niagara top. My last one was one of the last things I made a couple of years ago before the sewjo went MIA. I still love/wear it and want another. Stay tuned.

Wednesday, September 6, 2023

Soller Top - It's a Quickie

This is the Soller top from Itch to Stitch. It was a very fast sew! There's only one front and one back piece plus neck and sleeve bindings, and everything goes together very well. I like the top and the pattern a lot and I can see myself reaching for the Soller for more quick tops to be worn both at the office and around the house. 
The fabric is from Gorgeous Fabrics, one of the last pieces of fabric I bought before the sewjo up and vanished a couple of years ago. It was listed as a pique finish ITY but it feels more like Liverpool. I like the texture of it. The background is navy, although it shows up close to black here.

Below is the "envelope" cover for the pattern, with the designer Kennis modeling. As you can see, her finished top is at high hip level. I added about 3 inches in length to mine, 1 inch at the lengthen/shorten lines and 2 inches to the hem. I would have added everything to the hem but because I had to blend sizes dramatically due to Pandemic Butt, I opted to add some of the extra length near the waist to smooth out the resulting curve from the blending.
The bindings are "old school," meaning no coverstitch machine was used, and remind me of my sewing days before coverstitchers and sergers and using Kwik Sew methods. (RIP Kwik Sew.) Just attach binding RS to top RS, flip the binding over the neckline edge, and stitch-in-the-ditch from the top to catch the other side of the binding. You can see a hint of my ditch stitching. It really is a good method and faster than setting up my binder on the coverstitch machine.

For the vee "point," you clip at the point and attach the binding in a straight line and then stitch at the center to (re)create the vee. The print placement sort of makes my vee look off-center, but it's not. It is actually a true perpendicular line down from neck edge to point.
There is some "interest" at the upper chest, using clear elastic and a zigzag stitch to create gathers. If you make this top/dress, I would advise cutting your elastic longer than the pattern instructions so you have "tails" to hold on to when starting/stopping your zigzagging. You can then trim the excess tails off once your elastic is attached.
I did pull out the coverstitcher for the hem. Nothing too exciting here.  
The only other change to the pattern/instructions I made was to add about an inch to the bottom of the sleeve and to attach the binding strip as a band and not as a binding for a bit more length. As the pattern is, the sleeves are more like cap sleeves and I wanted a little more coverage. I also edgestitched the seam allowances up.
Nothing too fancy here either. I didn't even use my serger to finish the edges, choosing to keep this "old school" as well. I did serge the shoulder and side seams which you can alllllmost see down at the bottom left of the photo below.
Here's the top with a RTW navy maxi which matches perfectly. I also have more than enough of this fabric left for a matching skirt to create yet another 2-piece dress, which I will probably do at some point. Cyrus isn't yet sure what to make of Zillie. Until recently, she hadn't really been in use much since Cyrus came to live with me.
Since I've been using stash fabric for my recent projects, I gave myself permission to shop a couple of Labor Day sales. I really hadn't bought fabric in well over two years, so I have a lot of catching up to do. Hah.