Tuesday, August 20, 2019

Dinner is served (aka meal prepping)

(Not sewing related, unless you count the possibilities of extra hours which can then be spent sewing.)


I am NOT affiliated with anything I'm talking about here. I just stumbled upon this Meal Prepping plan and the related digital cookbooks, tried one out, liked the results very much, Instagrammed my cooked dinners, and had requests to share (both the recipes and the actual dinners! Hah!). So here I am. Sharing.

Meals above, left to right, top to bottom (which is the reverse order that I cooked them):
  • Sweet & Spicy Pineapple Chicken
  • Pork Loin in a Creamy Basil Sauce
  • Barbecue Paprika Chicken
  • Carnitas
  • White Chicken Chili
  • Cilantro Lime Chicken
  • Asian Fusion BBQ  Chicken
  • Korean Beef Tacos
  • Thai Peanut Chicken
A few words about the website where these recipes/booklets live. It's www.laurengreutman.com and the recipe booklets can be found here. Although I had not heard of her before stumbling onto the recipe booklets via another completely unrelated website, Lauren Greutman markets herself as a frugal-living, "Personal Finance Expert" and she has appeared on numerous American TV talk and morning shows and has been featured in various magazines. I say all this not because I care about all that stuff but because YOU might care and think I'm getting a kickback or affiliate fee from her. I'm not. I get nothing from this plug. I'm just sharing something I like. Like with sewing patterns, only this time, it's dinner.

The recipes/meal planning stuff Lauren sells fits into her "frugal living" lifestyle but you'll mostly see other stuff, and not these recipes, on her website pages until you start digging. I make no judgment on the financial info and associated planners, etc. she markets. I just know that I think her recipe booklets are well worth the $5.97 each they cost. And here's why.

Lauren estimates in her booklets that she spends about $150-$165 for the 20 meals. But she shops at Aldi (famously inexpensive U.S. grocery store); I don't. Her pricing is from years ago; mine is from August 2019. She also didn't include some "pantry items" (those things you usually have on hand); I had to since I had just moved and had been not keeping stocked up in anticipation of the move. Finally, she made 20 meals; I made 18, because I just didn't think I needed to crockpot-cook spaghetti and meatballs, so that was the one meal from the booklet that I didn't make or eat . I still feel spaghetti/meatballs as a crockpot meal is kind of pointless but the other meals and the methods overcome any imaginary points deductions for that one. And hey, I guess *she* likes spaghetti/meatballs in the crockpot and it's her book, so ….   :-)

I didn't track every last dime because I went to one regular grocery store and also the local farmer's market and I also bought a few other things not intended for the crockpot (drinks, toiletries, dog food, useless junk, etc.) and I wasn't doing this to save money. I spent about $220 total, so deducting for non-dinner items, that's still pretty good for 18 dinners and many take-to-work lunches. But it's not really the cost that has me sold—it's the method of putting together the meals and the daily time savings and mental space freedom from NOT needing to decide what's for dinner every night and then making it. That, to me, is nearly priceless.

The method is essentially one big assembly line of adding ingredients to freezer bags. Once I got home from the store(s), the whole process took me about 2-3 hours. But I haven't cooked a dinner from scratch since and we've been eating some delicious meals. There is some "side" prep work, such as cooking rice or noodles, or adding an ingredient or two the morning of or when it's nearly cooked, but that's it. Those "side" preps take maybe 15 minutes.

The booklets include complete shopping lists that you can re-print as needed. And they include the "one touch" assembly line cheat sheets for assembling the freezer bags. This is the genius part because you deal with each ingredient just one time and then move on to the next. You do not assemble each meal separately. Instead, you create an assembly line of freezer bags and add ingredients to the bags as you move through the cheat sheets (which are grouped into categories such as Meats, Spices, Liquids, etc. to make it even more organized and easy). When done, each bag contains a full meal (2 of each meal). And surprisingly, my kitchen wasn't even that messy once I was done. I just had to wipe down a cutting board, put away the remainder of the dry/pantry ingredients, and load the bags into my freezer. If you have helpers (spouse, partner, kids), it would go even faster than the 2-3 hours it took me alone.


Photo credit: www.laurengreutman.com

After the cheat sheets/assembly line pages, each meal has its own page with a photo and instructions specific to that meal (crock times, any "side" prep, etc.). The booklet also includes a regular (non-assembly line) recipe for each meal should you want to make it by itself at a later time.

As I write this, it's been a little over 2 weeks since I made the freezer meals (August 4) and this past Sunday we started getting into the repeats. I usually take leftovers for lunch at work and some meals have been enough for 2 nights *and* my work lunch, plus we ate out (sushi!) and opted for pizza for 2 Friday nights. I figure I'll need to go "big" grocery shopping again this coming Saturday morning and do the prepping after. So, from August 4 to August 24, I will not have thought "What's for dinner?"and instead, it will have been ready to go when I get home from work. I love that.

I started out with Lauren's Meal Plan 3 booklet because when I was deciding to do this, I thought it had a good mix of recipes. I've now purchased the other booklets because I didn't want to take any chance of not being able to. Again, I am not affiliated. I do not benefit from anything I've written here in any way. I just really, really like the way Lauren's method is organized, how much time it saves, how tasty the meals are, and even that I'm saving money—although that was not my main goal for doing this. Just having good dinners ready to go after work was my desire. The other benefits are a bonus.


It seems as though Lauren has been doing this a while, going by references I've seen on her website to other booklets beyond the 1-4 currently for sale and the way the PDFs I bought are named. I don't know why those others aren't available any more. I would definitely have bought those too. Hah.


Let me know if you have any more questions and definitely let me know if you try this and what you think. I'm obviously a fan!

Friday, August 9, 2019

Hidden Gem - Cashmerette Cedar Dolman Top

First things first. Yes, I have been absent from the blog for a freakin' long time. With that out of the way, soon I'll be buying myself a new home computer, so that should get me posting more often instead of waiting until I can "sneak" in a post from work (it's not really sneaking, but finding time because my work days are usually very busy). I've missed having a home desk.

Speaking of home … that's the biggest reason I've been MIA. I have moved yet again. (That's the new house from the listing photo below.) But this time (and hopefully the last for a LONG time), to a home I own. Relatively speaking because the mortgage company would probably have a bit of a say in actual percentage of ownership at this point. But it's good to be a homeowner again and in control of my living situation. I'm still in the City of Tampa; just a tiny bit further north. Instead of 7 minutes to work, it's now around 12 because of 2 additional traffic lights to get through. The new house is great. Lots more room all around. I won't have a dedicated sewing room (gasp!) but my bedroom is big enough to accommodate all of my regular bedroom furniture AND all of my machines and still feel roomy. It will work great for me … that is, as soon as I can finish unpacking and organizing.


This is the view from the LR into the dining area and kitchen, just after moving day. It looks a little better in here now, but not much. I want to hang shelves on the walls for books and a few deco items (very few since dusting is not my priority these days), but I haven't found the right shelves yet. I also need shelves in my bedroom so I can deal with my sewing stuff. I'm highly motivated to get on with those shelves, even if I have to settle for temporary versions, because not having them is holding up so much unpacking. And sewing.


So, on to the last sewing I did before I embarked on months of house hunting, packing, buying, and moving.

It's the Cedar Dolman Top by Cashmerette. And, for me, it's a hidden gem for two reasons: Letting it sit too long and not immediately looking past the envelope styling suggestions. Oh, and a third — nice fit! I'll have to double-check when I unpack this pattern again, but I believe I blended from size 16E/F at shoulder/bust to a 20 at hip. Whatever my blend was, it was straightforward going by my measurements to pick pattern sizing. I never have to adjust this mostly unfitted style during the day. It stays in place and doesn't slide forward or back as would a RTW loose-fit dolman that doesn't really fit, because my custom Cedar fits at both my shoulders and my hips instead of fitting one area and hoping for the best in the other.

I was given this pattern in PDF form by Cashmerette months and months ago, with no strings to test, review, photograph, or anything. And it sat in my download folder gathering digital dust. I finally opened the file, printed it, and brought it home. Where it sat collecting actual dust for a while longer. I'm not sure exactly what prompted me to at last have a go at it, but I did. I think I chose it because it looked fast and easy (spoiler alert: It is!) and because I was seeing lots of hem-tied tops out and about and I wanted in on that.


Looking past the pattern meant concentrating on the line drawings and not the athletic-wear styling and fabrication. I wanted a knit top I could wear to the office and out on the weekend. I'm so glad I finally cracked open the Cedar Dolman using some ITY dottie b/w knit because I have worn this top at least once a week since I finished it. I love it! It's comfortable. It's even trendy. And when I can finally get back to my machines, a second version is going to be the first thing I make.

The eagle-eyed among you may have noticed that I swapped out a "self-drafted" (using that term very loosely) vee neckline for the pattern's scoop neckline. I didn't find anything wrong with the pattern's scoop shape (except for my dislike of neckline facings in knits); I just prefer vees. I would show you the pattern piece with my changes, but it's still in a moving box somewhere. Below you can see the top on Zilly posing in a corner of my new bedroom.


Below is the inside view. I changed the order of construction a little bit by (1) sewing fronts to backs along the shoulder and overlocking, (2) turning and coverstitching the neckline, and (3) sewing the CF seam and pressing the unfinished seam allowances open. I then picked up where the pattern instructs to attach the tie and hem facing, which is a very nice finish for the ties and gives extra oomph to the hem, and well-drafted so it all fits together perfectly.


Here I am in a mirror selfie in the former house. Photobomb by Chili. It was still pre-summer temps because I'm wearing pants. It's now near 90°F every day. And so, so steamy. Ahhh. Florida.


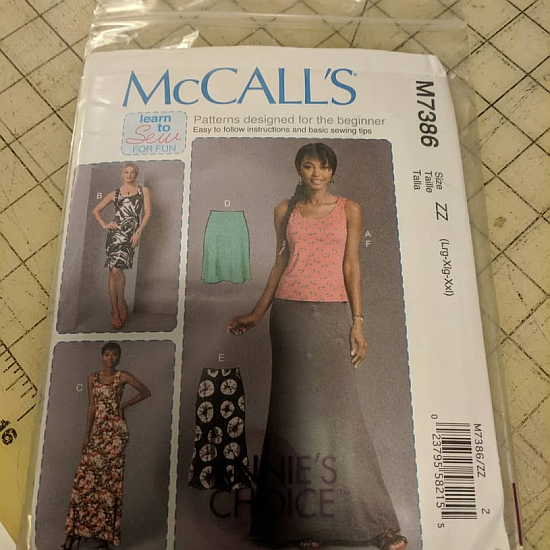
And here I am last week in work bathroom selfies with matching skirt. Because if you've been reading my blog for any amount of time, you know about me and my 2-piece "dresses." Plus, I needed to use up the extra fabric instead of packing it. The skirt is actually the very last thing I sewed before packing up all my sewing tools and supplies. It's McCall's 7386, version too-many-to-count.


And OMG that bathroom lighting does me no favors. I can't wait to get set up for pics in my new back yard. It's going to be great — brick pavers, natural light, tripod, privacy! (None of the stuff in the photos below is mine; these are more listing photos.) If only I could get Gillian to come down and take the photos! :-)


So that's what I've been up to. Plus work. You can also catch me on the Curvy Sewing Collective doing Pattern Roundups! See you soon!

Wednesday, February 20, 2019

Thoughts on Blank Slate Rose Tee


I like knit top patterns that are more than a basic tee, such as Jalie 2806, HotPatterns Sunshine Top, my beloved Ottobre tees, etc., and which have a bit of design "fullness" in front to cover my own "fullness." Enter the Blank Slate Rose. I bought/downloaded this pattern about 8 months ago and it's been in my queue for a while. Finally, its turn came.


The pattern calls for a woven fabric to be used where you see a print in the pattern photo, and the designer and most others I've seen who've made it (#bsprosetshirt) have used solids for the rest. If you know anything about me, you know I'm a prints and knits girl. Give me All the Print Knits!


I had some Liverpool scraps left from my Slouchy Cardi which I used to "opposite" color block. I did interface, (with a non-stretch fusible) the pieces which called for woven to be used, mostly because the b/w print is a *very* drapey, silky knit and it definitely needed some stability when used around the neckline. There are front and back facings on the inside which I also interfaced, but with a knit fusible on those, for a bit more "oomph." I did not interface the solid black pieces at all.


I'm very happy with how the neckline turned out, even though I generally hate facings in knits. The shape, width, and depth are perfect for me. Next time, I will definitely just bind the back neckline or turn and coverstitch, but a facing on the front in this design is actually needed for stability, and to cover all the piecing so the insides are pretty too.


The pattern went together well but it's not for an abundance of accurate markings. Look at the notches above ... they aren't even close to being correct. Sigh. I suppose it's a good thing these notches weren't even mentioned in the instructions, right? :-) Speaking of which, the instructions are  illustrated with mostly photos, which is OK, but the instructions for attaching the facings are just plain a bad method and will give you a lump at the shoulder seams if you follow them. My advice is to sew the facing shoulder seams together/press and the bodice shoulder seams together/press, and then join the facing to bodice at the neckline, RS together, stitch, and turn. In other words, the usual way. :-)

As usual, I laid my TNT Ottobre tee over the pattern pieces and compared. Below is the back. Can you see how straight up/down this original pattern is below my TNT? I'm not that shape, so I reshaped the armholes and waist/hip curves. I did the same for the front, which was also straight up/down.


Below is the pattern sleeve behind my Ottobre sleeve. Yikes. Good thing I was already planning to use my Ottobre sleeve.


I've been wanting to add a flounce to a short-sleeve knit top for a while and finally I did. Watch out, because I love it and I'm going to add flounces to all of my short sleeves. Maybe kidding.


Seriously, how fun is this?


I dug out my 1/4" downturn feller for my coverstitch machine …


… ran the flounces through it before they were attached to anything …


… and Voila! Perfect hems on a curve. Now I'm really adding flounces everywhere. :-)


I'm very happy with my top and will definitely make it again because there are a lot of color/print blocking possibilities with the neckline, and all of those pieces were accurate and sewed together well. But if I'm being honest, I don't think this top would have fit me as I prefer below the neckline without sewing a muslin and tweaking if I hadn't substituted my TNT shaping. I'm just curvier than it is (was).

After finishing the top, I had some scraps of the print left. Too big to toss, but maybe too small to be anything. Well, with some creative cutting and thanking my stars that the fabric is 4-way stretch, I was able to eek out a McCall's 7386 skirt. I love this skirt. I must have at least 8 of them in my closet now. I love the slightly flippy, slightly pencil, slightly A-line shape all in one skirt. It's perfect for the office. I'm sure I'll keep making it for years.


The finished 2-piece dress on Zillie …


… and on me with those awesome work bathroom selfies.


Oh, and remember I said I had to creatively cut the skirt pieces? Well, I also had to piece a section, which turned out to be the CB hem area, which hardly shows now. I'll never point it out off this blog.


Wednesday, February 6, 2019

In the Folds FREE Slouchy Cardi


What's better than a FREE, fast & easy sewing pattern? How about a FREE, fast & easy sewing pattern that will fit lots of bodies?


This is the Slouchy Cardi from In the Folds, offered for free download (FREE!) by Peppermint Magazine, here.

Click on the sizing chart below to enlarge it (or look at the sizing chart at the Peppermint Magazine site linked above). This pattern is drafted to be loose-fitting with a lot of ease, to give it that slouchy look. I'm not a huge fan of quite so much slouch so I picked my size by the finished measurements for Size F, which is still bigger than my actual measurements and gives me minimal ease, which is fine since the knit I used is plenty stretchy. (It's a Liverpool knit from Cali Fabrics, which is now sold out.) Because of the generous size range and sizING, this Slouchy Cardi will fit many shapes and sizes.


Here's the schematic for the pattern pieces. I wanted to point out the band piece and how long it is. (It's the sheets on the right starting at 35 and going straight down to 28.) Once you've got both band pieces sewn together and pressed, that's a LOT of curved band to wrestle with and attach evenly to the cardi body. Do not skimp on marking pattern notches (of which there are plenty, yay!) and do not skimp on pins. Do not do what I did and think you can just wing it, because you'll have to pin/re-pin about 378 times to get the band distributed evenly around the cardi body. Yeah. Not marking those notches was no shortcut.


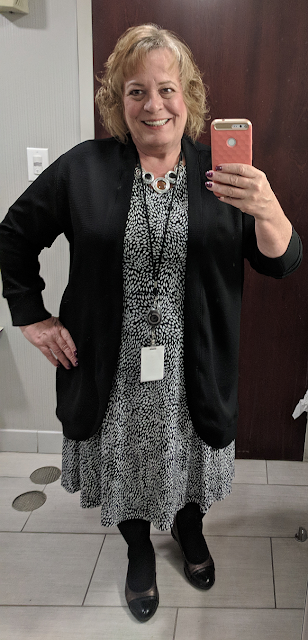
And here's another of the fantastic work bathroom selfies. To make things even better, of course I used black fabric so you can't see any details.


In order to zoom in so you can see a few details, it meant including items that really showed the bathroom part of the "work bathroom selfie." It's hard to believe this scribble erasing is from a former graphic designer, but hey … I'm at work and this computer has no real photo-editing software so it was either this or a toilet and tampon dispenser. Hah. Anyway, the sleeves are finished with a wide cuff. This sleeve is not too long for me; I'm just holding the cuff in an attempt to show it better. I'm pretty certain that worked better in my mind. If you click the photo to enlarge it, you might also be able to slightly see the curved band around the cardi body. What you won't be able to see is the sideseam pockets, because I didn't add them. I was already below the pattern's stated fabric requirements and pockets just weren't going to fit.


Below you can see that this is actually a fairly long cardigan. I really love how easy but elegant the curved band is. With this cardi's slight cocoon shape, longer length, and dropped shoulders, I'm feeling 1980s goodness all over again. All I need is my shoulder pads and Aqua Net.


The last two pics are essentially the same. All I moved was my head, trying for that artful pose or something. Yeah, no.


And that's pretty much all I have to say about that (Forrest Gump). The dress I'm wearing is a Cashmerette Turner, made a couple of years ago, and still in rotation.

I know this essentially was a drive-by review, but that's just about how fast it is to cut and sew this Slouchy Cardi. Especially if you do 99% with your serger. I did use my sewing machine to edgestich around the entire band (but not the cuffs) and that's it.

* * * * *

On a different and more serious note, thank you for all of your kind words after my last post. The boys are doing OK. It was a shock, and still is, but we're moving on. All of the blended family came together in St. Augustine for a "Celebration of Life." It was everything it should've been and Mike would have loved it.