Price:
 US $1100.00
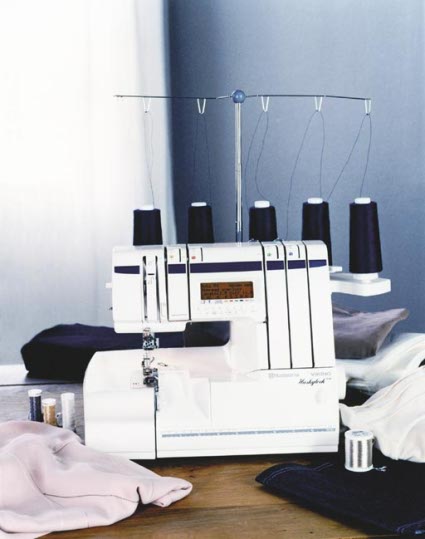
Features* Semi-Computerized/Sewing Advisor
* Free Arm
* Adjustable Stitch Length and Width
* Adjustable Presser Foot Pressure
* 3/4/5 Thread Serger
* Differential Feed
* Coverstitch
* Rolled Hem
Likes:Overlocking Stitch Quality: I'm very happy with it for overlocking and find the stitches are 99.99% uniform and consistent no matter what my fabric or thread.
Sewing Advisor and Memory: I hardly ever have to tweak the recommended settings since they are almost always exactly what is needed. The times I do tweak usually seem to be on lightweight knits, which means I press a button to adjust the differential feed just a bit to even out the stitches and fabric feeding. The settings are easy to read (and adjust) on the front-and-center positioned LCD screen, even for my 40-plus eyes. I do sometimes use the memory settings during some projects but I wish there was a way to name them and store that name with the settings because unless you have a great memory of your own, you'll need a little notebook near the machine as a cheat sheet to remember what is saved in each memory slot. So, I don't tend to use the memorized settings across multiple projects as I've forgotten what I saved and why by the time I get to another project.
Ease of threading: At first, going through the threads paths was awkward, but part of that was my newness to sergers and their thread paths in general. After about 2-3 months of use, it became second nature. The thread paths are clearly color-coded and diagrammed in the manual and on the flip-down cover. I also took 3 owners classes offered by my dealer, where she sat us down, cut all of the threads and "made us" rethread until we could do it on our own. Doing that gets you over your panic of breaking a thread and needing to rethread in the wee hours faster than if you just hope it never happens. :)
That said, I still find it faster to just tie on and pull the new threads through. But, I *can* thread it from scratch when I have to and without any trouble. Inevitably, you'll mess up something on your own (ahem, I could cite volumes on that) or run out of thread before noticing and you *will* have to rethread the "correct" way. You just can't expect threading 4 thread paths to be as fast as threading the 1 thread path on a sewing machine.
I noticed in the comments of another 936 review that someone has problems because of the thread order and having to rethread in order. While it's correct you do have to thread in order, if you do break a thread, you don't have to completely unthread everything and rethread entirely from scratch. You can just unthread the needle eyes and the end of the looper thread paths. Then rethread the ends in the correct order and away you go. So really, you're only rethreading the broken thread from scratch. The others you're only rethreading the very last parts. It's easier to do than describe.
Lay-in Tensions: I noticed that in some of the other 936 reviews, there were complaints about the first thread path. I've honestly never noticed this. I find the lay-in tensions to be great. I know by feel that my thread is seated correctly and there are no holes to thread through, which can sometimes necessitate the use of tweezers or bifocals. I have long fingernails and can thread without tweezers up until I get to the needle eyes, which is the same for me on each of my machines. My coverstitch machine does *not* have lay-in tensions and I do miss them on that machine.
Presser foot lifter: I love that the presser foot lifter is to the right side of the machine so I don't have to try to reach my hand behind the needles to lift the foot. Yes, this is in a different location than most sewing machines, but since sergers are NOT sewing machines, I don't think this is a problem at all and I think it makes more ergonomic sense where it is. Since you don't actually lift the presser foot as often as you do on a sewing machine, you don't use this feature at every session, but when you do need it, it's nice to have it handy for your right hand to grasp without taking your eyes or other hand off of your fabric.
There is also an "extra" lift feature for the presser foot lever (just pull up on it a little more than usual) so you can position extra thick fabrics with relative ease too.
Needle up/down: *All* Viking machines (sewing and serger) have a needle up/down feature accessed by tapping on the foot control once. If your needles are down, one tap and they're up. If the needles are up, one tap and they're down in the fabric. Thought I'd mention this specifically since this may be news to some of you not familiar with Vikings.
Presser foot tension adjustment: Changing presser foot tension is as easy as turning the dial on the left side of the machine.
Rolled Hems: Rolled hems are almost instant. No needle plates to change or accessories to add on. For 3-thread rolled hems, you just remove a needle, set the Sewing Advisor, and pull the level to set up the stitch finger. For 2-thread rolled hems, all of the above plus moving the built-in looper guard thingie into place.
Safety Features: These aren't a big deal to me but part of the reason is because I don't know better since this is my first and only serger. This machine will not let you stitch if the presser foot is up, or if the cover is open, or if you've overloaded the machine with too much fabric thickness. For those who are new to serging and "afraid" of sergers, these features will be reassuring .
Speed Control: By default, the serger sews at medium speed, which is good for going around curves or if you are new to serging. When you want to serge at Ludicrous Speed (reference Spaceballs movie!), just push one button and you're there. I do like this feature.
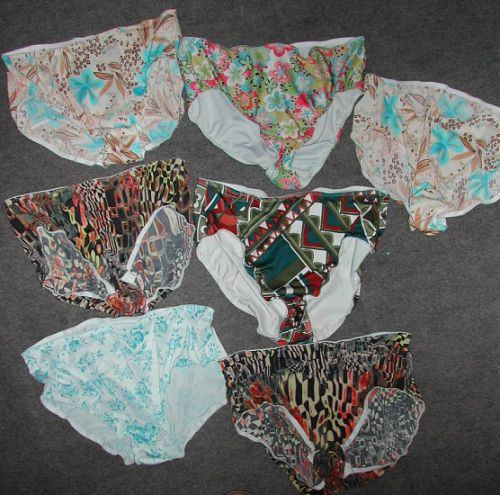
Speciality Feet: Viking makes a lot of specialty feet for their sergers, and I do use some of them, the gathering and elasticator feet most often. While I do have others that were part of my initial purchase deal, I don't use as many as I do on my sewing machine -- but that's because I'm in a comfort zone with my 936 and haven't been experimenting like I should. I've been kicking myself for not trying the elasticator foot earlier. Now I love it for making panties. And I'll never gather on the sewing machine again.
Dislikes:Coverstitching: As much as I like my 936 for overlocking, I never use it for coverstitching. Before I had my separate CS machine, I still didn't use my 936 for coverstitching and instead faked it with twin needles on the sewing machine. It's not that it's particularly *hard* to switch over for coverstitching, it's just that I have to switch -- period. I don't use coverstitching only at the end of a project, but also in areas in the middle of the construction phase. To keep switching back and forth is just too tedious for me to want to do all the time. Plus, the 936's coverstitch quality is not as good/consistent or as easy to control as my standalone CS machine.
Needle replacement: Although I can replace needles fairly quickly now, I think this is a feature which could benefit from a bit of re-engineering. The needle holes aren't particularly easy to find when you are new to this machine and I do recommend a dental mirror or similar to save yourself frustration.
There is no automatic needle threader and the "tool" supplied is not very user friendly. I use my serger tweezers and never have a problem threading the needles with it.
Comparisons With Other ModelsWhile I said in my review of my standalone coverstitch machine that if I had to do it over, I'd probably have purchased the 910 and saved the money I paid for the CS features of the 936, I do want to point out that the 936 does have 5-thread capability and the 910 only 4. I've not used the 5-thread safety stitch in my own sewing, but I know there are times when I should. I've just gotten a bit lazy and I will give it a try one day. This 5-thread stitch is an important feature to many serger users so I did want to mention it here.
My standalone coverstitch machine is a Babylock, with jet air threading. Honestly, I find the jet port to be a bit of a time waster when trying to set up the port and then feeding the thread into it, and usually I just tie on to my existing looper thread and pull the new thread through so I would never say that jet air threading is the end-all be-all. But that's me. I realize others swear by it, but you definitely pay extra for this Babylock-only feature.
I also prefer the extra table space on the 936 over most other models of sergers (esp. Babylock), and the free arm which I do use often. It's not small enough to pull a baby's sleeve around, but for my usual sewing, it's just fine.