Monday, January 1, 2001

Coverstitch: Examples

Picot edge elastic around a neckline:


Topstitching on a denim skirt:


"Straddled" topstitching around a neckband:


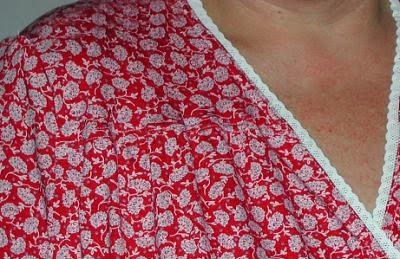
Topstitching around a vee neckband:


Free-standing binding strip used as self-fabric
drawstring:


Topstitched waist on lounge pants:


Beltloops made with beltloop folder:


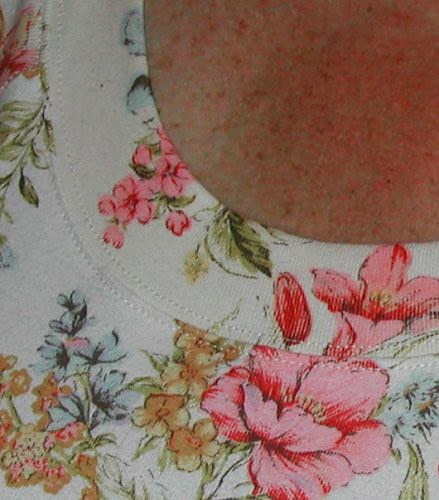
Applied neckline binding on tee:


Topstitching on tee:


Accents strips created with beltlooper and then
topstitched into place with wide coverstitch.


Bound neckline with free-hanging binding strips
as ties:


Double trim on crossover neckline:


Foldover Elastic binding on crossover neckline:


Camisole straps & binding completely done
with binder attachment as a continuous strip:


Topstitching on princess seams, looper side out:


Cardigan with bound edges & binding for ties:


Another neckline trim:


Sleeve trim on bathrobe/dressing gown:


Another sleeve trim:


Two rows of multicolor triple coverstitching
as "trim":


Panties/knickers: Plush elastic serged on, turned
and coverstitched. Elastic applied "in the flat."


Knit top, coverstitched on princess seams and
binding applied with binder attachment.


Sleeve hem binding:


Triple topstitching:


Coverstitch: General Hints & Tips

Needles

Babylock and Janome recommend Schmetz ELX705 needles for their stand-along coverstitch machines (The Brother 2340 can use all standard Schmetz needles, same as for your home sewing machine.)

The ELX705 scarf is longer than a standard sewing machine needle so when the looper passes it picks up the thread better. There is also a long groove at the back of the EL needle to hold the thread as it goes into the fabric to prevent abrasion and thread breakage. The Schmetz ELX705 needle point shape is similar to the light ball point Schmetz "SES" needle.

I use both Schmetz ELX705 and Organ SY2922 needles interchangeably in my Babylock CS, although the Organ needles are available in more sizes (#11/75, #12/80, and #14/90) and are usually less expensive so I've been using Organ needles mostly.

Thread nets

Always use thread nets on your needle threads. You may also want to use a net on your looper thread, especially if using Wooly Nylon. The nets provide an extra bit of tension needed to form prettier and more uniform stitches. See photos below. I must thank Belinda for urging me to use the nets already included with my machine's accessories.They really do make a big difference.


How to treat the beginning coverstitch needle thread, or when you start a coverstitch, can you just clip the threads, or do you have to pull them to the other side and tie them off?

There are various answers depending on what you're doing ...

If I'm coverstitching in the round (like a sleeve hem), I will pull the starting needle threads to the back so it looks neater. But that's me. The beginning stitches won't come undone easily so you can just snip them, but for added "insurance" you might want to either (a) start with a very small stitch length for a few stitches and/or (b) if stitching in the round, stitch over the first few stitches before pulling the ending threads to the back.

If I'm stitching flat and the stitches will be enclosed in a seam or crossed by other stitching, then I always just snip them.

Where to buy attachments and how to attach the generics?

Babylock, Brother, and Janome all have some attachments designed specifically for their branded CS machines. The Babylock CS machine can use "generic" industrial attachments without modification and they cost a fraction of the cost for the identical attachments sold through Babylock and its dealers. See photo below which shows a Babylock binder with generics. Which is the Babylock and which are the generics?


The other CS machines can also use most generics but you will have to somehow modify how you attach them to your machine. Blu-Tack or Sticky Tack or even duct tape and masking tape have all been used by owners of those machines. See the links below for Belinda's page and the Janome thread on Pattern Review.

Janome sells their own binder which comes with a flat plate which is attached to the bed of the Janomes before attaching the binder. I think Janome CS owners will have much better results with the generic binders if they first purchase the Janome "kit" so they can use this plate with the generics. See photo of Janome binder below.


I bought my generic attachments from an Ebay seller. His old Ebay ID was CutSewSupply but he is now selling under the ID of SharpSewing. Click Here for his Ebay store. I have absolutely no affiliation with this seller and he tends to not reply to most emails so I can't help you with that. I do know that he is reputable and any items you order will be received.

Sew Link on Amazon seller also has some generic binders (not a monetized link).

What size binder(s) to buy?

Well, here are my favs ... The binder I use the most is the 1-1/8" A style. This makes a 3/8" binding that is folded twice on top and only once on bottom.

My next fav is the 1-1/2" B, which makes a 3/8" binding folded twice both top and bottom.

After that, the one that makes 1/2" bindings folded twice (which is the *only* one I bought from the Babylock dealer).

I like the 3/8" bindings for girl stuff and the 1/2 bindings for the guys.

What size belt loop folder to buy?

Your preferences may differ, of course, but I like the 3/4" cut size belt looper folder which will make strips finished at 3/8". I think this size replicates RTW belt loops.

Other Coverstitching Links

Rebecca's Sewing Corner YouTube Double Fold Bias Binder Tutorial
and check out her other GREAT tutorials on YouTube here

Coverstitch: General Feller Set-Up & Use


There are many varieties of feller/folders. Some turn the fabric edge down one time, some turn down a double fold, others turn the fabric edge up, and still others will create felled seams between two pieces of fabric as you'd see on jeans, menswear shirts, etc. The photo above shows many sizes of clean finish, or double fold, feller attachments. In general, for home coverstitch machines, you'll use the single downturn feller to create topstitched hems with a covered raw underside edge, as shown below.

Fellers attach to the bed of the machine with thumbscrews. Some of the larger fellers (like the 1" feller below) can only be attached with one thumbscrew. That's OK -- just tighten the screw enough so that there's no play or wiggle in the feller.

It will take a little bit of experimentation with scraps to learn where to position your feller so that the underside of the hem is coverstitched without leaving excess to trim away. Once you have this position, keep the feller attached and remove the fabric. Use a Sharpie marker to mark the needle positions directly on the feller as shown below. From that point onward, you'll now be able to quickly line up your mark with the needles or needle markings on the foot and no more experimenting will be necessary. You may also want to mark the thumbscrew location onto the attachment.

If the screw holes in the bed of the machine do not alllow any further side-to-side adjustment, you can reposition the feller on the attachment bracket after loosening the metal screws just to the left of the white thumbscrew in the photo below. Once your feller is positioned as desired, don't forget to tighten those screws again.


To begin, finger or iron press a "starter" fold about 2" long and the width of the feller spec. My examples show a 1" feller, which means the finished width of the hem is 1". So, I would finger (or iron) press under a 1" width along the first 2" of the fabric.

Lift the presser foot and slide your raw fabric edge into the attached feller and allow the feller to turn the edge of the fabric the amount you marked. This sounds more complicated than it is. The feller will do most of the work with only a little guidance from you. You may need to slide the fabric back and forth under the presser foot a couple of times to seat the fabric into the folding curls of the feller.

Once the edge is seated, pull the fabric under the foot and put the foot down. Start stitching. The foot and feller will hold the fabric in place with only minimal guidance from you to keep the fabric from "dragging" in your lap, which could distort the felling action.


With a properly positioned downturn feller, this is how the fabric will come off the machine. The hem is topstitched on the right side and completely covered by looper stitches on the wrong side, with no excess to trim away. You can see a little bit of distortion as my fabric is leaving the feller. This is because I'm trying to stitch and take photos at the same time and the fabric is dragging below the machine bed. I needed my third hand!


Coverstitch: General Beltlooper Set-Up & Usage

Beltloop folders will have a "cut width" and a "finished width." Cut your fabric strips exactly the width specified for the cut width. If they are too narrow or too wide, they won't feed into the folder properly. You can use either knits or wovens.

Attach the folder so that the needles are centered over the exit point of the folder. I prefer to use the widest coverstitch (6mm) when making beltloop strips.


Once the strip is fed through and under the foot, start stitching. The folder does all the work! Your presser foot should hold the strip tightly in place so that you only have to provide the slightest guidance with your hands.


When you're done, you'll end up with a long strip which can now be cut into individual belt loop pieces.


The beltlooper folds both raw edges toward the middle while the machine coverstitches over the raw edges. It can't get simpler than this!

Coverstitch: How To End A Coverstitch

Thank you to Bryden S. for sharing this method with me. I hope everyone finds it as useful and timesaving as I do!

I use a stand-alone Babylock Coverstitch machine. You should be able to follow along with different brands, but some of the steps may be different (releasing tension, for example). Belinda has put together an excellent tutorial for ending the coverstitch on the Brother 2340CV, here.

Let's begin:

1. Stop stitching with the needles in the highest position, or turn the handwheel to raise them if needed. Next, raise the presser foot and release needle tension. (On the Babylock, raising the presser foot releases tension at the same time.)


2. With a long, skinny tool (I use the needle allen wrench which came with my machine), sweep under the presser foot and behind the needles, "hooking" the needle threads.


3. Continue sweeping forward until the needle threads are pulled out in front of the presser foot.


4. Continue pulling the needle threads until you have a thread loop about 4" long.


5. Snip the thread loop in the center so both needle threads are cut at the same time. (I usually snip while the skinny tool is still pulling the threads out, but I couldn't balance the tool, the scissors and the camera all at the same time.)


6. After the needle threads are cut, pull the fabric straight back.


7. Continue pulling straight back until the needle threads are pulled to the underside (this will happen as you pull the fabric back), and stop when you have about 5-6 inches of needle thread.

(In this photo, you see the needle threads that were cut from the needles laying on top of the fabric. The needle threads in the stitches have just disappeared to the underside by my pulling the fabric.)


8. Turn the fabric over and there are your needle threads on the underside!


9. Cut the looper thread, leaving a 4-5 inch tail at the machine for your next project.


10. Needle and looper thread tails ready for next project.


11. Underside. These stitches will not pull out. Try it! You can finish the tails by threading them under the looper stitches with a wide-eyed blunt needle, tying a knot, or applying Fray Block.


(If you are hemming or stitching in the round, you will need to manually pull the needles threads at the beginning of your stitching to the back before you get to the end so you don't stitch over exposed thread tails. I usually stop hemming right before I get to the end to do that, and then I continue the last few inches, stitch over the existing stitches for 2-3 stitches and then use the method above to pull the ending needle threads to the back.)