
This is how I make fly fronts on jeans, merging together methods originally learned from Betzina, Kwik Sew, and Palmer/Pletsch. I've had requests to make a tutorial and, well … here it is.
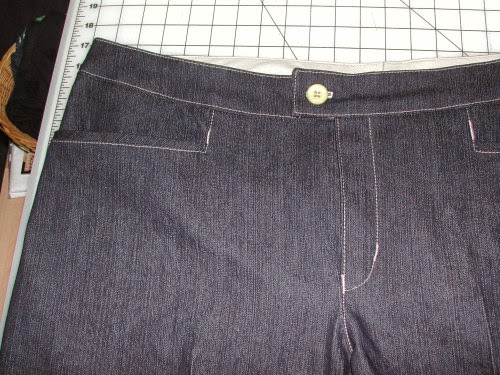
Finished view on actual jeans. The rest of the photos were taken using sample pieces so proportions will not be accurate. Also, these steps will result in a fly that opens like men's pants (left over right), which is common for jeans for both sexes.
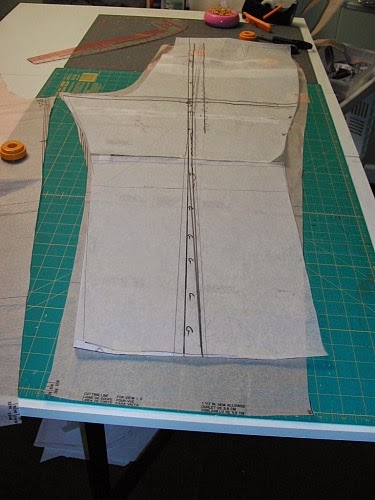
1. Front pants pieces with extended pocket facings in place. The shape of these facings isn't exactly right so I hope you can use your imagination for that. I extend the section of the facings that meets the center front so that it covers most of the vertical fly facing area. I prefer this for stabilization instead of fusible interfacing on the fly facings. The edges of the fly facings, front crotch curve and pocket facings should be overlocked (or otherwise edge-finished) before starting. The pocket facings and fly facings are not serged together even though they sort of look like it here.
2. Baste from the waist to the red dot where the fly facing starts to curve. Lock stitches and then straight stitch between the dots using a regular stitch length. Stop about 1 inch from the inseam.
3. Clip the fly facings at the bottom of the curve. I clip diagonally so the cut is on the bias and won't fray.
4. Press fly facings open from both wrong side and right side to create a crisp fold.
5. Use a big jeans/denim needle. For heavy denim, I use 110/18.
6. After pressing, the first step is to top/edgestitch the center front of the fly. I use my center rudder (stitch in the ditch) foot with the needle in the far right position. Don't forget to increase your stitch length for topstitching, especially with heavy thread.
The completed edgestitching.
7. Now for the zipper. Use a zipper that is longer than the fly opening. It will be cut off at the top after the waistband is applied (not covered in this tutorial). I also never insert a zipper without Collins Wonder Tape. Apply a strip of Wonder Tape on each top side of the zipper tape, starting at the bottom metal stop and for as long as the fly opening. Do not peel off the paper yet.
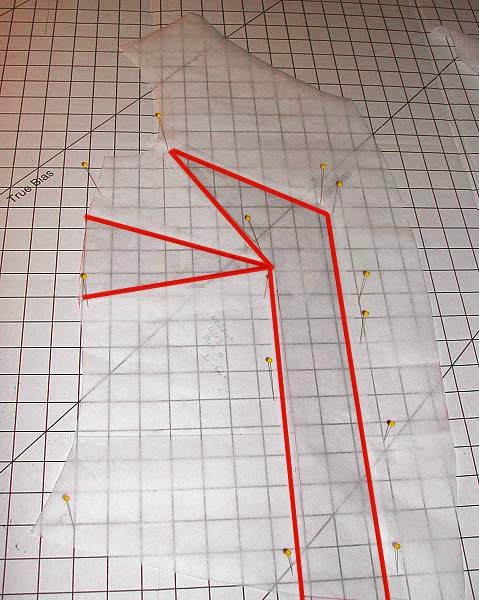
8. Peel off the Wonder Tape paper on the left (as you're looking at it face up) side only. Turn the zipper right side down and align the now left edge of the zipper with the center front seam. Finger press on the right side of the zipper to stick it onto the fly shield. The only part of the zipper which should be stuck is shown by the red line below.
9. Move all layers to the left, except for the zipper and the fly facing it's stuck to, as shown below.
10. With a zipper foot, stitch close to the zipper and again close to the edge of the zipper tape. I swear, I usually sew straighter than this but I was hurrying to make this sample and so it is what it is.
11. Turn zipper over and remove the paper from the other strip of Wonder Tape.
12. Turn the assembly face down again and pull the zipper over to the other fly facing as far as it can go without rippling. Because denim is thick, the fly facings won't lay flat at this point. Just keep things even and neat and you'll be OK.
13. Move all layers to one side, except the zipper and the remaining fly facing. Stitch close to the zipper and again near the edge of the zipper tape. I stitch bottom to top for this side.
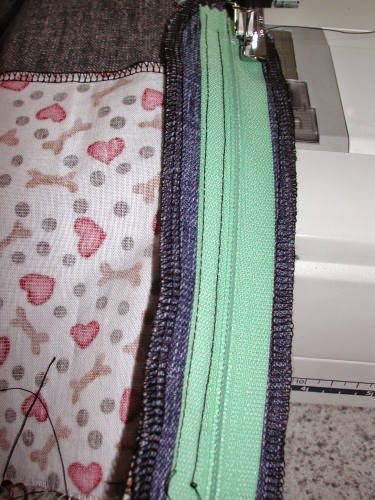
14. Turn the assembly over and remove the center front basting. Stop ripping when you get to the regular length stitches!
15. Unzip the zipper and press the underlayer flat. Steam/press out the fold from the basting seam and press in a crease next to the zipper.
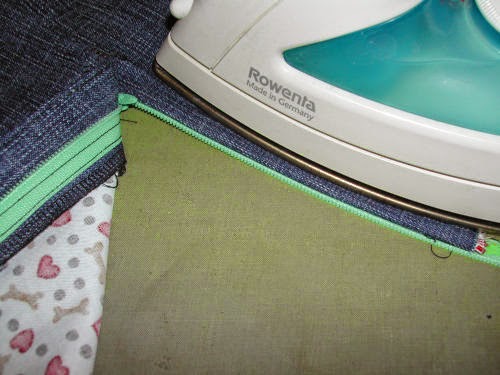
16. Use a template to chalk in a guideline for topstitching the fly. Unfortunately, I think the templates I use aren't being made anymore. A piece of oaktag or the back of a zipper packet will work too. Be careful that your chalk line doesn't cross the zipper stop or you'll break a needle when you're topstitching.
17. Topstitch along the chalked line. I use the ditch foot for this too, as the rudder stitcks up and makes it easier for me to see where I'm going. An applique foot would work too, but this foot would already be out and I'm lazy.
18. Fly shield. (If you don't want a fly shield, skip to Step 20.) I use good quality cotton for my pocket bags and fly shields. It holds up well, doesn't get all wrinkly in the laundry and doesn't add the bulk that the same pieces in denim would
For the fly shield, cut a piece of fabric the length of the zipper facing and twice the width. Fold in half lengthwise, wrong sides together and press. Zip the zipper and then place the raw edges of the shield over the overlocked edge of the fly facing. The fold of the fly shield is being pointed to by the red lines in the photo below.
19. Overlock the raw edges of the fly shield to the zipper facing. You can include, or not, the pocket facing (the section behind the fly facing) in the overlocking. Next, overlock just the bottom edge of the fly shield. I missed getting that in the photo.
20. Open the pants front to expose the fly shield.
Using the ditch foot and left needle position, stitch to the left of the zipper coil from waist down as far as you can before hitting the zipper tab. See the red line in the photo below.
21. With all layers smooth and flat below, bartack from the top as shown below. You are trying to catch the flyshield with the bartacks. See the photo below with the bartacks circled in red.
Voila! You're done. Don't cut off the top of the zipper until after you've sewn on the waistband so that you don't accidentally zip the tab right off the top of the zipper coils.
When you are edge/topstitching along the Center Back and crotch curve seam, use the ditch foot with the same needle position as in Step 6 above and all the stitching will line up perfectly. With the jeans inside out, start at the CB and stitch along the seam, catching the seam allowances underneath. Stop at the front where your fly topstitching ended, pull the threads to the back and secure them.
Sunday, April 1, 2001
Thursday, March 1, 2001
Alterations: Cheater FBA
With knits lately I've been "cheating." Instead of doing a regular slash/spread FBA, I've just been blending between sizes as I trace or cut, like this:
I'll start with the size that corresponds to my upper bust measurement. For this drawing, that would be the Gray size inside the black outline. Then I move out at armhole level to the size that corresponds to my full bust. Here, it's the Blue size. And then I gradually morph downward to the size that corresponds to my hips. Here, it's the Purple size. I end up with a pattern that resembles the Gray plus Red outline.
This cheating method works for me because I also usually also have to increase the bicep width in sleeves and the morphing shown above does increase the sleeve size needed. But now, instead of actually slash/spreading the sleeve, I just use a similar morph between the sleeve size that matches the Gray size I started with and I extend the underarm seams to the Blue size, like this:
As I said, I use these cheaters mostly for knits. (And before you ask, No, I don't find that the front bottom hem rides up. Your mileage may vary.) I will also sometimes use these morphs as a starting point for wovens too, because then I'll need a much smaller dart/spread when doing a traditional FBA.
I'll start with the size that corresponds to my upper bust measurement. For this drawing, that would be the Gray size inside the black outline. Then I move out at armhole level to the size that corresponds to my full bust. Here, it's the Blue size. And then I gradually morph downward to the size that corresponds to my hips. Here, it's the Purple size. I end up with a pattern that resembles the Gray plus Red outline.
This cheating method works for me because I also usually also have to increase the bicep width in sleeves and the morphing shown above does increase the sleeve size needed. But now, instead of actually slash/spreading the sleeve, I just use a similar morph between the sleeve size that matches the Gray size I started with and I extend the underarm seams to the Blue size, like this:
As I said, I use these cheaters mostly for knits. (And before you ask, No, I don't find that the front bottom hem rides up. Your mileage may vary.) I will also sometimes use these morphs as a starting point for wovens too, because then I'll need a much smaller dart/spread when doing a traditional FBA.
Alterations: Full Bust Adjustment for Shirred/Gathered Front
First, the pattern is slashed and spread and a dart is added to the non-darted tee, using the method in Fit For Real People (Palmer/Pletsch), shown here. The alteration shown is a large FBA, even for me, but the pattern I started with was about 1-1/2 sizes down from my usual size and required a bit more extra width.
In order to transfer the horizontal bust dart to the center front shirring, the pattern is slashed 3 times at the shirred center front. The slashes are cut up to, but not through, the bust point (where the horizontal bust dart is currently pointing to). Three slashes are added so the dart can be transferred incrementally over the bust area instead of transferring the dart to just one place.
The horizontal bust dart is closed by sliding the dart "edges" toward the center of the dart. As this dart is closed, the slashes added in the step above spread open, transferring the dart to the shirred front area and at the same time, adding additional length to the area which will be shirred. The additional length is needed by full busts, so this is a good thing!
Spread the slashes evenly (they are not even in this pic!), add additional pattern material underneath and secure the alterations to save as your final pattern.
This is the finished top. The full bust alteration adds needed width at the bust and also extra length to go over a larger bust. By transferring the horizontal dart to the center front shirring, the style of the original pattern is unchanged.
In order to transfer the horizontal bust dart to the center front shirring, the pattern is slashed 3 times at the shirred center front. The slashes are cut up to, but not through, the bust point (where the horizontal bust dart is currently pointing to). Three slashes are added so the dart can be transferred incrementally over the bust area instead of transferring the dart to just one place.
The horizontal bust dart is closed by sliding the dart "edges" toward the center of the dart. As this dart is closed, the slashes added in the step above spread open, transferring the dart to the shirred front area and at the same time, adding additional length to the area which will be shirred. The additional length is needed by full busts, so this is a good thing!
Spread the slashes evenly (they are not even in this pic!), add additional pattern material underneath and secure the alterations to save as your final pattern.
This is the finished top. The full bust alteration adds needed width at the bust and also extra length to go over a larger bust. By transferring the horizontal dart to the center front shirring, the style of the original pattern is unchanged.
Alterations: Square Shoulders
There's not a whole lot to say. Well, maybe there is, but not from me. ;-)
The above illustration is how I do a square shoulders adjustment on my sewing patterns. I lift the outer edge of the shoulder (usually 3/8" - a little goes a long way here) and also lift the underarm the same amount. This keeps the armhole the same length so that sleeve adjustments are not necessary.
I usually just draw these adjustments on the tissue before I cut out or trace the pattern so I don't have to go back and add tissue for the adjustment later. A straight edge for the shoulder line and a French curve for the armhole are handy.
And that's it.
For sloping shoulders, you would do the opposite. I.e., lower the outer edge of the shoulder and drop the armhole the same amount.
Alterations: X-Wrinkles Wedge Adjustments (Pants)
This is how the back of my pants usually look, RTW or sewn-by-me. I've been calling it the X-wrinkles. The X-wrinkles are wrinkles and folds that radiate from my inner thigh to knee at the back.
While a fisheye dart (FED) seemed to cure most of the problems, it never quite resolved all of the X-wrinkles. As my pants fitting continues to evolve, I think I've found my solution by addressing the X-wrinkles as two separate fit issues (high hip, full inner thigh) and altering for each by incorporating a "wedge" to add more fabric length where it's needed. In other words, adjusting where the X-wrinkles are pointing to.
If the FED works for you, keep using it! The adjustments below and/or here (Minott) and here for full inner thighs are what I think works better for me.
The photo above shows my FED pattern (white) laid over my wedge-altered Simplicity 4068. You can see there is a leg "shift" difference between the two.The altered Simp gives me more fabric at the upper inseam and at the high hip. (Pardon all the lines and scribbles on the FED pattern -- I was experimenting.)
In addition to the FED alteration, I had also been altering for full thighs by adding to the crotch points. Yet, I would still have rear "crotch smiles." So, I would add more. And still I would have those crotch smiles. Clearly, this wasn't working.
So I dug out the fit books and realized that while I have full thighs, the fit alteration I really need was one aimed at knock knees because my full inner thighs were mimicking the results a truly knock-kneed person would see. And the light begins to turn on …
I found the inseam wedge alteration in Fast Fit (Sandra Betzina) and coupled that with another wedge at high hip to add the extra length needed to go over that area. It's almost like splitting the FED into two, which for me is what I need because each side of what would be a FED needs a different size wedge.
Below is my altered Simplicity 4068 pattern.
The red lines are the wedges. The upper wedge is for high hip.
(I added the high hip wedge lower on the front than I really wanted, but I was trying to keep the pocket area unchanged. Because the first sew of these pants resulted in a bit of poofiness at the front crotch, next time I will add this wedge higher and redraw the pocket.)
The lower wedge is to add length at the inseam.
After my initial pin-fitting in fabric, I also incorporated the alterations shown in yellow and blue.
The yellow lines reflect (1) removing hip width, (2) lowering crotch depth front/back, (3) lengthening the rear dart, and (4) returning the crotch points to the original pattern lines because I didn't need the extra I added. (Truing the grainline is also shown in yellow but I did this before cutting the fabric.)
The blue line at the back crotch curve shows where I deepened the curve.
The black lines are original pattern seam and grain lines. You can see that these alterations do not throw off the grainline very drastically.
This is the result, standing with my legs together …
… and with my legs slightly apart:
And this is how I usually stand, one knee locked, one bent, and one hip higher than the other. Yeah, not every stance is a perfect view. Once you move in real life, you *will* have wrinkles. LOL!
Subscribe to:
Posts (Atom)