Tuesday, September 19, 2006
Bits and snips
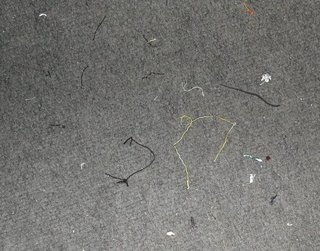
This is the carpet under my cutting table, after a week. I recognize all the snips except that yellow-ish one in the middle. What/where did that come from? I'm sure you can all relate. So now before I start another project, I feel the need to vacuum. It shouldn't be too hard because the vacuum is actually still in the sewing room from last week. I've been tripping over it for days, which somehow didn't spur me on to actually using it and putting it away. The biggest problem with vacuuming in there is that as soon as I finish, the threads and fabric bits will jump back onto the floor in the blink of an eye. A creative room definitely doesn't equal a vacuumed floor.
In other bits mostly unrelated to this or each other ...
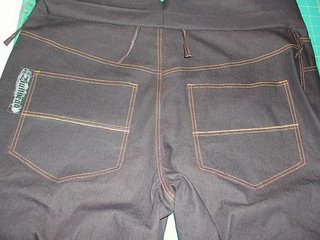
It was the pockets of DS' jeans that I slightly screwed up. There is a row of satin stitching and a row of regular topstitching across the center. On one pocket, the satin stitching is the upper row. On the other, it's the lower row. Not a huge deal in the grand scheme of things, but not what I had intended. I'm over it now but those little goofs do bug me when they happen, being the OCD idiot that I am. And if it had to be, why couldn't I notice it before I attached the pocket to the pants and thus have a less labor-intensive opportunity to fix it — or, even better, not notice at all?
DS#2 has been into me sewing for him lately. He doesn't want to go to the mall (yay! neither do I) but he wants new things. I think seeing the stash out of bins and now quite visible in the open closet has given him a mental green light for shopping it. I like sewing for my sons because they usually have a unique style or design in mind and so in a way it feels like we're collaborating. Which I guess we are. It's also quite ego-boosting that they believe I can make anything. Lucky for me they aren't wanting 3-piece suits.
I started and finished this shirt last night.

It's Simplicity 4207, reviewed on PR here. DS' input was on the iron-on transfers. He had sketched it out and laid it on my desk without me knowing and I found it afterward. Isn't that cute? How could I refuse?
He did love it, but he's not about to grin in any 6:30 a.m. photo! I made the shorts he's wearing too, the test shorts here. Gotta love a kid that asks for sewing and then wears it too!
Sunday, September 17, 2006
Drowning in blogs??
This is probably old hat to many of you, but for those of you who are becoming overwhelmed with checking all your fav blogs individually, lookee here! MaryB clued me in to Bloglines when I first started this blog, by asking me to add the Bloglines button to my sidebar. (It's at the top right if you're looking.) When she asked, I had no idea what Bloglines was ... being a blog newbie and all. So I looked into it, liked it, and have been using it ever since. Thanks Mary!
Bloglines is free, easy to use, and makes keeping track of new blog entries a snap. It's like an email client for blogs, except there's nothing to download or install on your computer. You join, set up a profile and then access your "feeds" via the web. I keep my personal Bloglines feeds page set as my "Home" page for IE so that when I open IE or click the Home button, I can see at a glance what's new in Blog-land. It's so handy!
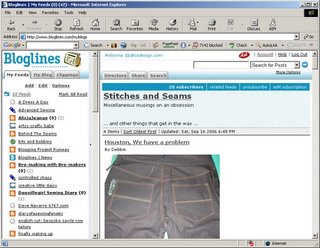
Looking at the screenshot above, my folder with my list of favorite blogs is (partially) shown expanded in the left column and the latest entry for the selected blog (mine for illustration purposes) is shown in the right pane. If you look closer at the list on the left, you'll see some blogs have bolded and/or grayed numbers after their name. Bolded means it's new/unread and the number indicates how many entries are new/unread. The grayed numbers are those which I've clicked on and then marked "keep as new" to return to when I have more time to read or if they mention something I want to note for later.
You can choose to be a public or private subscriber to a blog. If you're public, other subscribers will see you in a list of subscribers. If you're a private subscriber, you're an invisible lurker to all. Also, if you're public, the blogs *you* subscribe to are visible. Sometimes I like visiting the blogs subscribers subscribe to. I've found some interesting reads that way.
There are many options for how you subscribe to others' blogs, how those blogs are organized, displayed and updated on your Bloglines page, and other stuff I'm forgetting. It's straight-forward to set up with the defaults, though, and as you become more familiar with the options, you can start playing with them.
To read or add comments, you'll still need to be on the actual blog page and some feeds don't show all the photos, but no problem ... Just click on the blog entry title in the right pane and a new window with the actual blog entry will open. Easy-peasy.
Anyway, I just thought I'd mention Bloglines. There are other subscription services out there but I'm only familiar with this one -- commentors please feel free to plug any others.
Saturday, September 16, 2006
Houston, We have a problem
So these are the jeans I'm working on for DS in bits and spurts around all the other drama going on in various parts of my life right now. I keep sewing though, because I need to unwind.
While it's not YAPOS, this is the third pair of pants (all for the same DS) I've made from Burda 2713 in the last month. This pattern rocks!
OK, back to the topic at hand (or at least in the subject line) ...
I goofed. It's a stupid mistake and I didn't notice it until this morning. Can you see it? Discuss among yourselves. Remember, you can click the pic for a bigger version.
I'm thinking I'll leave the mistake and call it a design feature. Mostly because I don't even want to contemplate the ripping and re-do, but also because it does actually look kind of cool in a teenager jeans sort of way.
And about that squirrel ... DH got it out of the house shortly after he got home that day. He blocked off the doorways, opened the french doors to the outside, cleared a path from the fireplace and opened its glass doors & screen. He then sat down to wait until the squirrel ventured out, which only took about 5 minutes. Although DH was armed with a broom, the squirrel seemed to have overheard the plan and went straight for the outside. Whew! No, DH has still not screened over the chimney. Sigh.
Tuesday, September 12, 2006
Unexpected company
So this morning I'm mindlessly checking emails, reading blogs, message boards, etc. and in the background I hear the neighbor's lawnmower running over branches and chopping them up. Nothing out of the ordinary there. Except, wait. The neighbor has finished mowing and I'm still hearing that chopping. And ... it's coming from INSIDE the house. Like in the NEXT ROOM!
Of course, DH is gone for the day and I can't
I've got the sound narrowed down to coming from the fireplace but it's too dark behind the TV to see just what is making the noise. And do I really want to know? So I go upstairs figuring IT and I can wait for DH.
And then the phone rings. And I have to go downstairs to find the info the caller wants. And the noise is even louder.
Putting on my brave face (for who? it's just me and the dog, who by the way has shown absolutely NO interest in the The Noise), I peek behind the TV again ... and this is what I see.
Except before the flash illuminated the entire fireplace interior, all I could see was the little paw sticking out over the top of the door.
So that's where we are now. DH is on his way home, but we still have no idea how we're going to get the squirrel out of the fireplace without chasing him around the entire house. Oh, and did I mention that we found a dead squirrel in the fireplace the day that we closed on this place, over 3 years ago? I think this will serve as the reminder for DH that he was going to put a screen over the chimney.
In other miscellaneous "news" ...
This is what my old sewing set-up in the corner of my bedroom looked like shortly after we moved in. If you've been reading, you know that I finally have a real (nearly completed) dedicated sewing room now.
This is what I moved in to fill the space my sewing stuff used to occupy. And, I've ridden it for the past two days. I hope I can keep it up, and also use the other exerciseWish me luck!
Monday, September 11, 2006
Sunday, September 10, 2006
Knocking Off Sunshine
This is my finished "muslin." I've been wanting to make a top like this after seeing similar tees in the stores, on the street, and patterns such as the Hot Patterns Sunshine Top, and Kwik Sew 3418 (not sleeveless on me though!). Then Gigi starting hers really motivated me to start mine. Thanks Gigi! :-) I'm looking forward to seeing how yours turns out.
I wasn't sure how all the gathering would look on my full bust, but since this tee is more fitted at the waist than a flowy peasant blouse or tunic-y tee, I think it's actually OK and doesn't invoke the is-she-or-isn't-she maternity question.
Because I have a great base pattern using my pattern software (Pattern Master Boutique), I knew it would be easier (and lots cheaper!) to start there and morph this style than to start with a purchased pattern and alter. So, that's what I did. I used the editing module of PMB which makes the editing fast and easy. If you have a similar TNT (tried and true) pattern, you can make this top too by copying the steps below with a pencil, scissors, a curve, and a ruler.
I started with my darted tee pattern (1). I reshaped the neckline to a low scoop and then added a 1.75" band (2).
Next, I cut the band from the bodice (3) and extended the dart to the bust point (4) in order to rotate the dart (below).
I rotated the side bust dart to the neckline (5) and then spread/slash the neckline an additional 3 inches to create more gathering (6).
The final step for the front was to true the neckline where I had spread it. (7).
Now onto the back. I aligned the shoulders of the front and back pieces (8). I used my original front pattern from (2) above so I could transfer the neckband shape/size onto the back.
Since I have a very narrow back shoulder dart, I just eliminated it when I drew the back neckband (9). I cut the neckband from the back pattern (10).
After reshaping the hems to a slight curve, the final step was to add seam allowances to all pattern pieces, as shown below.
Edited to Add: A (blurry) photo of me wearing the top.
Friday, September 8, 2006
Are You Ready for Some Football???
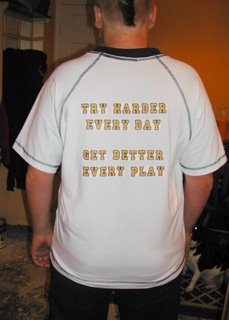
It's that time of year again ... high school football and parent tee shirts. Unfortunately for all the other moms, the tee shirts only come in male sizes and fit. Fortunately for me, I can change that.
Here's this year's installment of Football Tee Shirt Re-Make. I made this one longer overall and wider in the shoulders than my usual because I'm expecting residual shrinkage. (Cheap jersey!) I replaced the white rib at the neckline with navy, and I love the new contrast.
This year's bling:
As we were serving the team meal today (one of my Team Mom duties), one of the coaches asked if he could still order some tees, one for him and one for his wife (tee shirt sales are another of my duties). I told him I wasn't sure but I'd check with the supplier. I asked what sizes/styles he'd need. He looked at me and said, "One of those for my wife and a long-sleeved for me." Oops. Sorry Coach. :-)
If you'd like to see previous years' remakes and a mini tutorial on the remaking, click here.
Now I'm OUTTA HERE as it's Friday night and the game starts soon. Unfortunately, it's going to be the second night in a row for a totally rainy game. Son #2 played last night and we all got HOSED! Tonight we're going prepared -- the rain ponchos are already in the car.
GO COUGARS!
Saturday, September 2, 2006
Grand Intentions, Humble Actuality
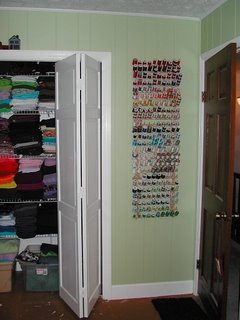
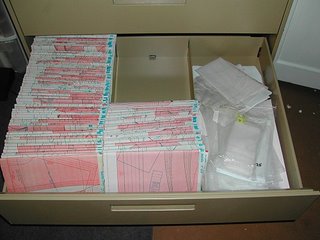
DH hung my thread racks today, which means my bureau top in the bedroom is free and clear again (and in sore need of a thorough dusting). I originally thought the racks could be hung over the pattern cabinet but I realized I wouldn't be able to reach spools on the top left rack without a stepstool so Plan B went into effect.
While DH was working on the racks, which took a LONG time because of hard-to-screw-in toggle bolts into paneling, I decided to organize the last 18 months or so of my Burda WOF magazines. I had stopped separating the parts right before our move and hadn't picked it back up because most of the mags were still in boxes.
Now I'm current with the pattern sheets being filed away in the pattern cabinet.
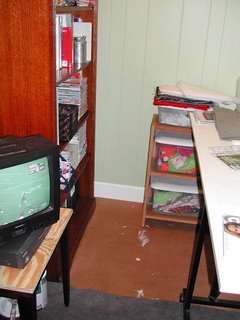
The newsprint line drawing/construction sheets are filed in the two big white binders on the left side of the 4th shelf down in the bookcase below. The magazines (or the remains thereof!) are stacked at the right side of that same shelf. And, of course, a football game is playing on the little TV.
Oh, and isn't that just a fabu light "fixture" atop the shelf?? Everyone needs a 500 watt shop light in their sewing room. I just hope it doesn't melt a hole in the ceiling before I buy a more suitable replacement.
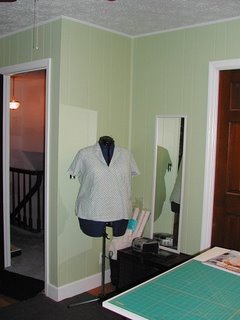
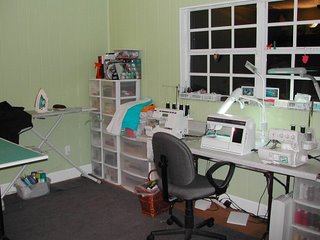
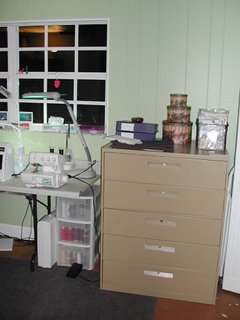
The rest of the pics are the 50¢ tour of the sewing room still in progress. There's no permanent flooring at the moment, just some temporary throw rugs that mostly cover the floor. It's going to be a major PITA to move everything when I finally do put the final flooring in, but there are worse things to contemplate so I won't complain ... too much.
(I haven't mentioned it before but I hope that it goes without saying that you can click on all pics in my blog entries for bigger versions.)
No. I still haven't sewn the buttons on yet.
Can you spot Gumby and Pokey, and Melbourne, Australia?
The 3 stacking boxes are sewing themed and I've had them almost 2 years waiting for this moment. I've moved my button stash (most of it) into the biggest one for now. I really want something clear for the buttons at some point.
I made those little houses atop the closet back in my "crafty" days. I also made the redheaded wooden doll you can sort of see in the bookcase pic above.
I really need to paint the last coat of white on the closet doors so I can put the knobs back on them. I meant to do that today too but I forgot until it was too late to not be interfering with DH's thread rack installation. And then I didn't feel like it. I'm sort of fighting a slight cold. I don't feel miserable, but just enough different to know I'm not entirely 100%. What a drag ... literally.
This and the next pic are the areas of the set-up that still bug me and I'm going to keep thinking of a better solution. There is room to walk around the table and get to the bookshelf so it's not horrible. I just don't like the little shelf at the end and how cramped my ironing board feels. I need some storage up on the walls, which will come when I've had a chance to think about what I really want.
Friday, September 1, 2006
The Christening
The new sewing room has officially been used to make something ... other than a mess. Woo hoo! I love all the room to spread out in there. This was an easy project but that's just what I needed right now after the busy week of moving things in and around, plus the usual football Team Mom duties.
This tee is for DS#2 and is made with my TNT (tried and true) tee pattern for my sons, Kwik Sew 3299. He doesn't know I've been making it so he'll have a surprise when he wakes up tomorrow. Since tomorrow is a Game Day (for his brother's Varsity team), I'm not sure if he'll wear this or a football theme tee shirt. We'll see. I won't be insulted if he chooses the latter. (5 AM Update: He chose the Metallica tee!)
Once again, I used my favorite "embellishing" trick for my teen sons' mom-made tees — iron-on transfer paper for dark colors. I love this stuff because it has an opaque white background. Anything white in the image stays white after it's ironed on to the fabric. Most transfer papers have "show through" where white would be and are best used on plain white fabric. This paper gives results much more like screen printing and you can use it on any color, even black. It also washes well and the print colors don't fade. I made the first tee shirts using this transfer paper a couple of years ago and they are still in great shape. My review for this pattern is here.
I used to buy Epson brand transfer paper at Office Depot until they stopped carrying it or Epson stopped making it — I'm not sure which. I bought my last supply at http://www.printonit.com/ (NAYY). I bought 50 sheets for about $1/sheet. I can usually get two designs per sheet if I lay them out carefully. Still, the fabric was "free" since it's been in my stash forever and the pattern has been used many times making it nearly free too ... so $1 for a design paper is pretty cheap I think (especially if you add in the "looks RTW and not homemade" factor). If you don't want to spend $50, you can also buy in smaller quantities for just a tiny bit more per sheet. (Hmmmm. Maybe I should think about coop-ing this stuff.)
Here's a close-up of the design. I grabbed my sharp, pointy embroidery scissors, plopped myself down in a chair, and custom cut the design to incorporate the dripping outline. I think it turned out pretty darn cool.
The colors are a bit off in the photos. In reality, it's an olive drab tee with a darker olive rib at the neck and the inside of the transfer design matches the tee fabric perfectly. From a short distance it looks like an outline instead of a filled shape.
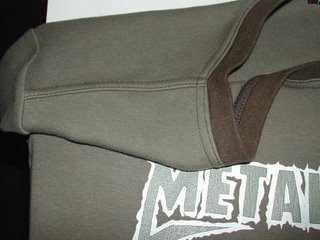
Here's another close-up showing the contrast coverstitching around the neckline and shoulder seams. Gosh, I love that little coverstitch machine!
As for the sewing room ... boy is it ever nice to walk to my pattern notebooks, pick out a pattern, pull it from the drawer, cut my fabric, sew, press, serge and coverstitch ALL IN THE SAME ROOM!