Yep, you read that correctly. Seamwork.
I've been eying the
Seamwork Meg dress for a while. There's just something about it that called to me.
So I decided to test out a Seamwork membership because with a 15-day trial membership you get a free pattern download plus access to all the other membership stuff (message board, member projects, tips, project sheets, videos, etc.). If I decided to cancel, I'd still be able to keep the pattern at no charge and I wouldn't be charged for the membership — your credit card is not charged during the trial period. Good deal, right?
So, I downloaded the pattern to have a look at the drafting, sizing, and instructions. I printed out everything and taped the pattern together. It all seemed in order. (I have some opinions — shocker! — about some of the instructions which I'll share later but overall, they're fine.)
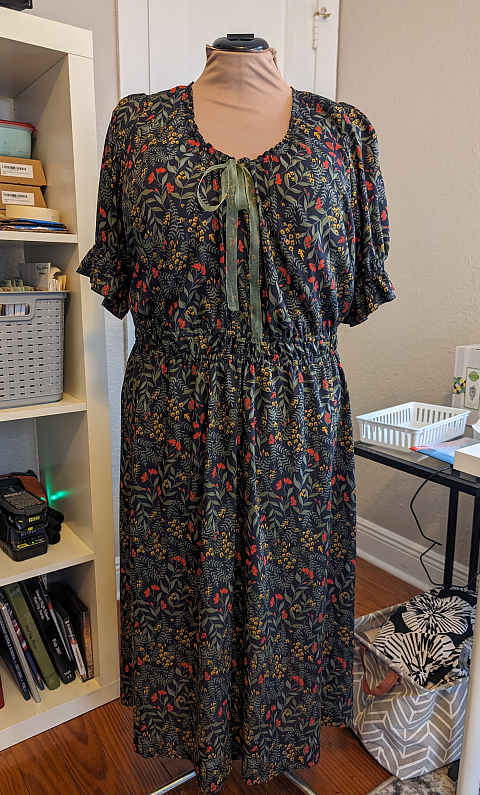
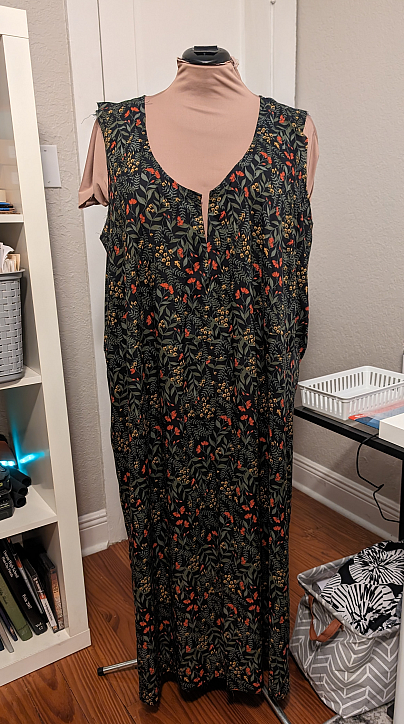
And here is my dress (still to be hemmed). And I love it!
My measurements put me in a size 20 bodice, but this pattern has a lot of ease and after reading through some of the Seamwork "Community"
(message board) and seeing some YouTube videos on this and other Seamwork patterns, I think Seamwork patterns run large. I cut an 18 bodice and blended to a 22 at the waist/hip. My measurements would put me in a much larger hip size but there's plenty of design ease in this dress so I stayed at the 22. My sizing decisions worked fine. I also added length to the bodice. Instead of cutting the bottom edge at the 18 lines, I extended to the 22. Kind of a cheater FBA. Seamwork is supposed to draft for a DD in the larger size range, but, again, after my research, I thought I would need more bust length. I was right. The width is fine, but again, lots of design ease.
The fabric is rayon voile from Fabricmart. It was supposed to be challis, but it's not. I'm not lucking out with Fabricmart rayons lately. But I do love the actual print. Also, I see that I still need to more evenly distribute the elastic in the channels so the waist is looking a bit wonky.
(If only I could distribute my own waist so quickly.)
The tie is organza ribbon from deep stash. I'm still "auditioning" it and I may end up making a tie from the leftover fabric, of which there is a lot. But I do like the bit of contrast so the ribbon may stay.
These are the "bonus" sleeves, which are "puffed" and have an elastic channel to create the gathered hem flounce. Members get "free" bonus views of patterns that you don't get if you just buy the pattern without a membership. I think that's how it works, anyway. The non-bonus sleeves are flutter style.
Line drawing of the bonus view.
Here's the dress in progress to show how low the neckline is before gathering shortens it. I also added about 6 inches to the skirt length, much of which is now taken up by the waist elastic. I haven't done a final hem yet, but I'm thinking I'll keep most of the extra length.
Side note: Cyrus decided the pattern tasted good and I found this after walking into the sewing room one day. My fault for strewing pattern pieces all over the place. It taped together fine, but it turns out that the bonus view also comes with its own bodice pieces so I didn't need the chewed piece in the end.
Now on to my opinions about the instructions. Overall, they are fine and will get the job done, especially if you have some experience. But some of the methods are not necessarily "Best Practices." For example, almost everywhere, you are instructed to finish
(zz or serge) seam allowances separately. Technically, that's fine. But it's not necessary to construct the pattern and on my lightweight fabric, serging one layer was horrible. I quickly ditched that after being sure no seams actually had to be flat. If there's no construction need for the seam to be flat/open, then I think the instructions should offer a choice.
Ironically, there is no instruction to finish the seams of the CF bodice and facing, which means they end up raw edges which can be fiddly inside the neckline channel if your ribbon insertion doesn't go smoothly. The facing should be interfaced and it's not. This would eliminate one of those raw edges in addition to just giving the facing a bit more something-something IYKWIM.
Another "bad practice" is you are instructed to sew the bodice sideseams before attaching the facing and doing the topstitching to it. Much, much easier to do all that in the flat and THEN sew the sideseams.
Lastly, the pattern uses 5/8" seam allowances everywhere. I know this is technically OK and standard for Big 4, but I personally hate a 5/8" seam allowance on a sleevecap. Since this one is gathered, it wasn't a big deal, but if it wasn't, I would have trimmed it down.
Out and out mistakes include some typos, a missing instruction to remove basting stitches from outside a seam allowance (the puffed sleevecap), and no instruction to understitch the facing join seam. These are things a sewist with experience would just do so they didn't slow me down, but a beginner would have no idea.
So, did I cancel my trial membership? Actually, I did not. I'm enjoying the behind the scenes features and other members and there are a number of other patterns I want to download/try, plus I might actually go through their Design Your Wardrobe class at my own pace since my closet needs a huge overall. I think I'm actually seeing marked improvement from Seamwork patterns and practices since their early days and I'm willing to give them another chance. We'll see how I feel next year at renewal time.
* * * * *
Now for
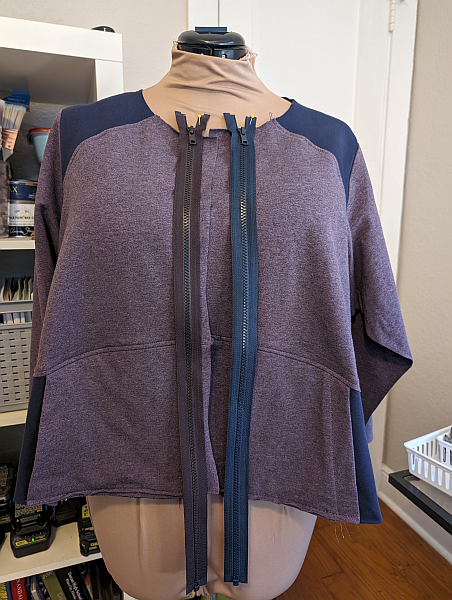
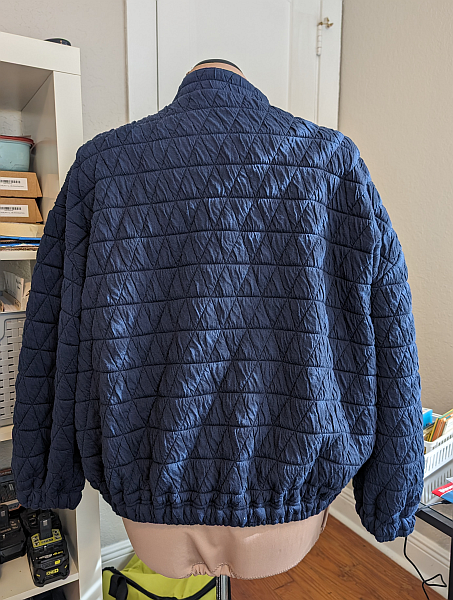
The Wadder (HotPatterns Beatnik). Ugh. This fabric
(French terry) is so nice that I hate to waste it so I'll probably just literally wad this up and put it in a pile for a while until I can repurpose it. But the actual garment is a Big No. It just looks horrible on me. It's just too much fabric in the wrong places and not enough where it's needed, and the neckline sits funny on me. I've wanted to try this pattern for a while and I'm glad I did finally get to it. It's now out of my system. I'll be trying a
Cashmerette Stanton next, I think.
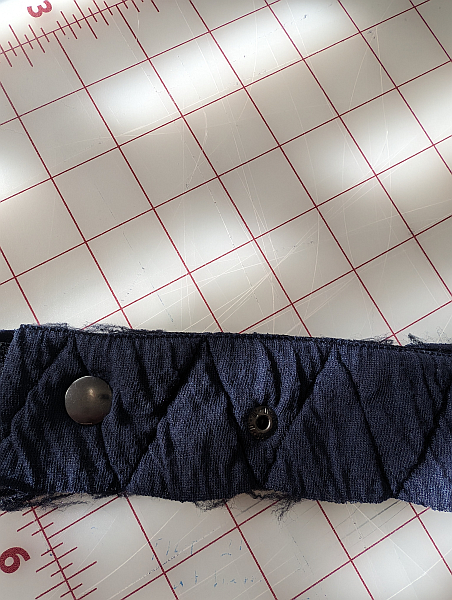
The topstitching looks so wonky in these pics. That's about the only thing that actually turned out OK, but it doesn't look like it. Hah.
Parting Shot: If you've made it this far, here's Alex prepping the bird for our Thanksgiving last week. He's an excellent Cook
(haha, get it?). Seriously, though, he's done the turkey for a couple of years and it's always been SO GOOD. That's one of his 3 dogs, Oreo, standing behind him. Anytime anyone is in the kitchen, so is Oreo. It was a low-key but enjoyable day with my sons and all the dogs. I finished up the last of the leftovers last night. I'm ready for more turkey!